Rustoleum Spray Paint for Outdoor Light Fixtures: A Comprehensive Guide
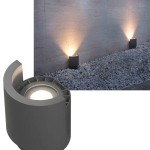
Outdoor light fixtures are essential for illuminating pathways, enhancing security, and adding aesthetic appeal to your home's exterior. To ensure their longevity and functionality, it's crucial to protect them from the elements with a high-quality paint. Rustoleum spray paint specifically designed for outdoor light fixtures offers excellent performance and durability.
When choosing Rustoleum spray paint for your outdoor light fixtures, several key factors to consider include:
- Finish: Rustoleum offers various finishes, including flat, satin, and gloss. Flat finishes provide a matte, non-reflective surface, while satin finishes have a slight sheen. Gloss finishes offer the highest level of shine and are best suited for areas exposed to moisture.
- Color: Rustoleum provides a wide range of colors to match your home's exterior and personal preferences. Choose colors that complement your home's architectural style, such as black, bronze, or white.
- Durability: Rustoleum spray paint is formulated to withstand harsh weather conditions, including UV rays, rain, and extreme temperatures. Look for paints labeled "weatherproof" or "exterior-grade" for optimal durability.
Before applying Rustoleum spray paint to your outdoor light fixtures, follow these steps to ensure a professional-looking finish:
- Clean the Light Fixtures: Remove any dirt or debris from the fixtures using a cleaning solution and a soft cloth. Allow them to dry completely before painting.
- Mask the Surrounding Area: Protect areas around the light fixtures that you do not wish to paint using masking tape or a drop cloth.
- Shake the Can Thoroughly: Shake the Rustoleum spray paint can vigorously for at least 2 minutes before applying. This ensures the paint is evenly mixed.
- Hold the Can Upright: When spraying, hold the can approximately 6-8 inches away from the surface. Keep the can upright to prevent drips or runs.
- Apply Thin Coats: Apply several thin coats of Rustoleum spray paint instead of one thick coat. This allows each layer to dry properly and prevents smudging.
- Allow Drying Time: Allow each coat of paint to dry thoroughly before applying the next. Check the paint can's instructions for specific drying times.
By following these guidelines, you can achieve a durable, professional-looking finish on your outdoor light fixtures using Rustoleum spray paint. Enjoy the benefits of enhanced aesthetics, protection, and longevity for years to come.

How To Update Outdoor Light Fixtures The Easy Way Confessions Of A Serial Do It Yourselfer

Painting Over Brass With Rustoleum Oil Rubbed Broe Paint A Tutorial I Should Be Mopping The Floor

Diy Light Makeover Using Rustoleum Oil Rubbed Broe Leap Of Faith Crafting

Spray Painting Outdoor Lights It Works Thrifty Decor Diy And Organizing

How To Update Outdoor Light Fixtures The Easy Way Confessions Of A Serial Do It Yourselfer

Outdoor Light Fixture Makeover Using Metallic Paint Inmyownstyle Com

Diy Light Makeover Using Rustoleum Oil Rubbed Broe Leap Of Faith Crafting

Painting Over Brass With Rustoleum Oil Rubbed Broe Paint A Tutorial Home Remodeling

Rust Oleum Stops Decor Satin Spray Paint Black 12 Oz Harris Teeter

Outdoor Light Fixture Makeover Using Metallic Paint Inmyownstyle Com
Related Posts