Running Wire for Outdoor Lighting: Essential Aspects to Consider
Illuminating your outdoor spaces with captivating lighting fixtures not only enhances their aesthetics but also ensures safety and security. Running wire for outdoor lighting is a crucial step in bringing your lighting vision to life. However, it's essential to approach this task with the necessary knowledge and preparation to ensure a successful and long-lasting installation.
Before embarking on your wire-running journey, a comprehensive plan is paramount. Determine the placement of your lighting fixtures and the path the wire will take. Consider factors such as existing structures, landscaping, and pathways to avoid obstacles and minimize potential hazards.
The type of wire you choose plays a pivotal role in the longevity and performance of your outdoor lighting system. Opt for wires specifically designed for outdoor use, which possess enhanced resistance to moisture, UV radiation, and extreme temperatures. THHN or THWN wires are commonly employed for outdoor lighting due to their durability and high insulation rating.
Proper wire sizing is crucial to prevent voltage drop and ensure the efficient operation of your lighting fixtures. Determine the total wattage of all the lights connected to each circuit and refer to a wire size chart to select the appropriate gauge. If in doubt, consult a qualified electrician to ensure adequate wire capacity.
Before burying the wire underground, it's essential to protect it from damage and environmental factors. Consider installing conduit or PVC pipes to safely house the wires and prevent direct contact with soil or moisture. Burying the wires at a depth of at least 6 inches provides additional protection against potential damage caused by digging or foot traffic.
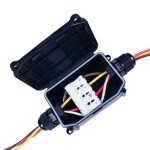
When connecting wires, meticulous attention to detail is paramount. Ensure secure and weatherproof connections using appropriate connectors or junction boxes. Apply electrical tape or heat shrink tubing to seal connections and prevent moisture ingress, ensuring the longevity of your lighting system.
Once the wiring is complete, meticulously test the entire system to verify its proper functionality and identify any potential issues. Switch on the lights and inspect their performance, checking for any flickering, dimming, or other irregularities. If any issues arise, carefully troubleshoot the system, checking connections and verifying voltage levels to isolate and resolve the problem.
Remember, running wire for outdoor lighting involves working with electricity. Always prioritize safety by following industry best practices and adhering to local electrical codes. If you lack the necessary expertise or experience, it's highly recommended to consult a licensed electrician to ensure a safe and professional installation.

Outdoor Low Voltage Lighting Diy Family Handyman

Using A Cable To Hang String Lights Concord Carpenter
How To Hang Outdoor String Lights Resource Article By Partylights Com

The Easiest Way To Install Low Voltage Landscape Lighting Abby Organizes

Wirefy 14 2 Low Voltage Landscape Lighting Copper Wire Gauge Conductor 100 Feet Com

12 2 250 Ft Direct Burial Cable For Landscape Lighting Volt
:strip_icc()/SCW_262_06-7705039be81e4d52b647966e9dff1249.jpg?strip=all)
How To Extend Power Outdoors

Using A Cable To Hang String Lights Concord Carpenter

How To Install Landscape Lighting The Home Depot

The Easiest Way To Install Low Voltage Landscape Lighting Abby Organizes
