Essential Aspects of Replacing an Outdoor Light Fixture
Maintaining the functionality and aesthetic appeal of your outdoor lighting is crucial. Whether you're upgrading old fixtures or installing new ones, successfully replacing an outdoor light fixture requires careful planning and execution. This guide will provide you with comprehensive instructions on the essential aspects of this task.
Choosing the Right Fixture
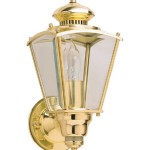
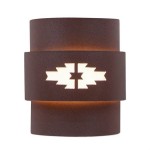
Selecting the appropriate outdoor light fixture is paramount. Consider factors such as style, brightness, durability, and weather resistance. Choose a fixture that complements your home's architectural style and provides adequate illumination for the intended area. Pay attention to the fixture's IP rating, which indicates its protection against water and dust.
Safety Precautions
Before commencing the replacement process, ensure your safety by following these precautions:
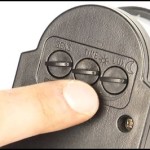
- Turn off the power supply to the fixture at the breaker panel.
- Wear appropriate safety gear, including gloves and safety glasses.
- Use a non-conductive ladder for stability and avoid touching live wires.
Removing the Old Fixture
Carefully remove the old fixture by following these steps:
- Unscrew the mounting screws or bolts.
- Disconnect the electrical wires, noting their positions for reconnection.
- Carefully remove the old fixture from the mounting surface.
Preparing the New Fixture
Before installing the new fixture, prepare it by connecting the electrical wires according to their designated colors (black to black, white to white, green to green). Ensure secure wire connections using wire nuts or electrical tape.
Mounting the New Fixture
Mount the new fixture onto the mounting surface, carefully aligning the electrical wires and screw holes. Secure the fixture with the provided mounting hardware.
Electrical Connections
Complete the electrical connections by matching the wires from the new fixture to the wires from the electrical box. Use wire nuts or electrical tape to secure the connections and ensure they are fully insulated.
Finishing Touches
After connecting the wires, carefully tuck them into the electrical box and secure them with a wire clamp or electrical tape. Install the light bulb or bulbs into the new fixture and tighten them securely.
Testing and Troubleshooting
Turn on the power supply at the breaker panel and test the new fixture. If it does not illuminate, troubleshoot potential issues such as faulty wiring connections or a defective bulb.

Replacing An Outdoor Light Fixture

Replacing An Outdoor Light Fixture

How To Replace An Outdoor Light Fixture Facets Of Lafayette

How To Replace An Outdoor Light

Home Improvement How To Remove Replace Outdoor Light Fixtures Porch Driveway Etc

How To Replace An Outdoor Light

Replacing An Outdoor Light Fixture

How To Replace An Outside Light

Replacing Outdated Porch Lights Megan Plus Five

How To Replace An Outdoor Light
Related Posts