Repairing Outdoor Light Fixtures: A Comprehensive Guide
Outdoor light fixtures are essential for illuminating pathways, enhancing safety, and adding aesthetic appeal to your property. However, these fixtures can occasionally malfunction or sustain damage due to various factors such as weather conditions or accidental impacts.
If you encounter any issues with your outdoor light fixtures, it's important to address them promptly to ensure safety and maintain the functionality of your outdoor space. Here is a comprehensive guide to help you repair outdoor light fixtures efficiently and effectively.
1. Safety Precautions
Before attempting any repairs, it's crucial to take necessary safety precautions to prevent electric shock or other accidents. Turn off the power to the fixture at the main breaker panel. Use a non-conductive ladder or step stool for accessing the fixture safely. Wear protective gloves and safety glasses to protect yourself from debris or flying sparks.
2. Identifying the Problem
Inspect the fixture carefully to identify the source of the problem. Check for loose connections, damaged wires, faulty bulbs, or broken components. If the fixture is not receiving any power, verify that the power supply is turned on and that the circuit breaker or fuse has not tripped.
3. Tools and Materials
Depending on the nature of the repair, you may require basic tools such as a screwdriver, pliers, wire cutters, electrical tape, and a voltage tester. If the fixture needs to be replaced entirely, ensure you have a compatible replacement fixture and the necessary mounting hardware.
4. Repairing Loose Connections
Loose connections are a common cause of flickering lights or complete fixture failure. Tighten all screws and terminals using the appropriate screwdriver. Avoid over-tightening, as this can damage the components or strip the threads. If the terminals are corroded or damaged, they may need to be replaced.
5. Replacing Faulty Bulbs
If the bulb has blown out, simply remove the old bulb by unscrewing it or removing the cover and gently pulling it out. Replace it with a new bulb of the appropriate wattage and type. Ensure the new bulb is securely seated in the socket and the cover is properly secured.
6. Fixing Damaged Wires
Damaged wires can be a safety hazard and should be repaired immediately. Carefully cut the damaged section of the wire and strip back the insulation on both ends. Connect the wires using a wire nut or crimp connector. Wrap electrical tape around the connection to insulate it and prevent short circuits.
7. Replacing the Fixture
If the fixture is beyond repair, it will need to be replaced. Disconnect the wires from the old fixture and remove the mounting hardware. Install the new fixture by securing it to the mounting bracket or junction box. Connect the wires to the appropriate terminals and tighten the screws securely.
Conclusion
By following these steps, you can effectively repair most common issues with outdoor light fixtures. Remember to always prioritize safety and consult a qualified electrician if you encounter any complex electrical problems or have any doubts about your abilities. Regular maintenance and prompt repairs will ensure your outdoor light fixtures continue to illuminate your outdoor spaces safely and efficiently.

Outdoor Light Fixture Repair Tips And How Tos Life S Dirty Clean Easy

Outdoor Light Fixture Repair Tips And How Tos Life S Dirty Clean Easy

Light Fixture Installation Repair Performance Ac

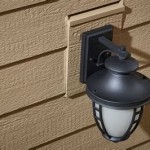
How To Change An Outdoor Porch Lantern Sconce Light Bulb Simple Diy Do It Yourself Procedure Hq

Outdoor Light Fixture Repair Tips And How Tos Life S Dirty Clean Easy

How To Install Replace Outdoor Light Easy Simple

Lighting Installation Repair Outdoor Colorado Springs One Source

Outdoor Lighting Repair Troubleshooting Landscape

Expert Lighting Repair Brookfield Wi Licensed Electricians

How To Change An Outdoor Porch Lantern Sconce Light Bulb Simple Diy Do It Yourself Procedure Hq
