Painting Brass Outdoor Light Fixtures: A Comprehensive Guide to Enhance Curb Appeal
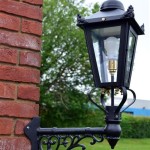
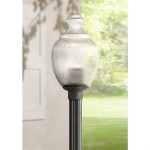
Brass outdoor light fixtures exude a timeless elegance that complements various architectural styles. However, the relentless elements can tarnish their lustrous finish over time. Painting these fixtures is an effective way to restore their beauty, protect them from further damage, and enhance the overall aesthetic of your outdoor space.
Essential Considerations Before Painting
Before embarking on the painting process, it is crucial to consider a few essential factors:
- Surface Preparation: Cleaning and preparing the brass surface is paramount for proper adhesion.
- Paint Selection: Choose a paint specifically designed for outdoor use with a finish that can withstand the elements.
- Color Choice: Select a color that harmonizes with your home's exterior and complements the surrounding landscape.
Step-by-Step Painting Instructions
Once you have carefully considered the essential factors, you can begin the painting process:
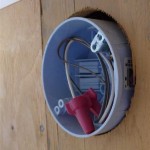
1. Clean and Prepare the SurfaceRemove dirt, grime, and any loose paint from the brass surface using a mild detergent and a soft-bristled brush. Rinse thoroughly and allow the fixture to dry completely.
2. Sand and Apply PrimerLightly sand the brass surface with fine-grit sandpaper to create a smooth base for the paint. Apply a thin coat of primer specifically designed for brass and allow it to dry according to the manufacturer's instructions.
3. Apply the PaintApply two to three thin coats of paint using a high-quality brush or spray gun. Allow each coat to dry completely before applying the next. For a smooth and durable finish, use a brush with soft bristles and follow the grain of the brass.
4. Protect the FinishOnce the paint has completely dried, seal it with a clear protective finish designed for outdoor use. This will help protect the painted surface from weathering and moisture.
Tips for a Flawless Finish
- Use a brush with soft bristles to avoid scratching the surface.
- Apply thin coats of paint and allow each coat to dry completely before applying the next.
- Allow the fixture to cure for at least 24 hours before re-installing it.
- Clean the painted fixture regularly with mild soap and water to maintain its appearance.
- Inspect the painted surface periodically and touch up any areas that may have chipped or faded.
Conclusion
Painting brass outdoor light fixtures is a relatively simple yet rewarding task that can enhance curb appeal and protect your fixtures from the elements. By following these detailed instructions and incorporating the provided tips, you can achieve a stunning and durable finish that will grace your outdoor space for years to come.

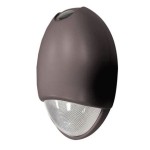
Painting Brass Lamps Before After Diy Lamp Makeover Outdoor Light Fixtures

Painting Over Brass With Rustoleum Oil Rubbed Broe Paint A Tutorial I Should Be Mopping The Floor

Painting Over Brass With Rustoleum Oil Rubbed Broe Paint A Tutorial Decor Home Diy

Painting Over Brass With Rustoleum Oil Rubbed Broe Paint A Tutorial I Should Be Mopping The Floor

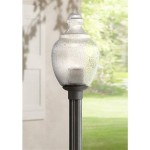
Make Old Outdoor Lighting Look New For 20 Thrifty Little Mom

Ugly Light Fixture Makeover Garden Sanity By Pet Scribbles

Outdoor Light Fixture Makeover Using Metallic Paint Inmyownstyle Com

How To Paint Light Fixtures Front Porch Refresh Budget Friendly

Outdoor Light Fixture Makeover Using Metallic Paint Inmyownstyle Com

Easy Exterior Light Update Outdoor Fixtures Painting
Related Posts