Outdoor Recessed Lighting Installation: A Comprehensive Guide
Outdoor recessed lighting, also known as "can lighting," is a popular choice for homeowners seeking to enhance the ambiance and safety of their outdoor spaces. Recessed lights offer a sleek, unobtrusive appearance while providing ample illumination. Installing these fixtures, however, requires careful planning and execution to ensure proper functionality and long-lasting performance. This comprehensive guide will delve into the key considerations and steps involved in installing outdoor recessed lighting.
Planning the Installation
Before embarking on the installation process, meticulous planning is paramount. This involves several crucial aspects:
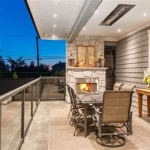
- Determine Lighting Needs: Consider the purpose of the outdoor lighting. Are you aiming to illuminate pathways, highlight architectural features, or create a cozy atmosphere? This will guide the selection of fixture types, wattage, and placement.
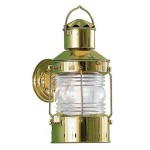
- Choose Fixture Type: Outdoor recessed lights come in various styles and materials. Aluminum and stainless steel are durable options for withstanding weather elements. LED fixtures are energy-efficient and long-lasting.
- Plan Layout and Placement: Map out the desired locations for each fixture. Ensure even illumination coverage across the desired area. Consider factors such as existing structures, landscaping, and potential obstructions.
- Assess Electrical Requirements: Determine the required electrical capacity and circuit breaker size based on the total wattage of the fixtures. Ensure the existing electrical system can handle the added load.
- Obtain Necessary Permits: In some areas, permits may be required for electrical work. Contact your local building department to ensure compliance with regulations.
Installation Process
Once the planning phase is complete, the installation process can commence. This involves the following steps:
- Prepare the Area: Clear the installation area, removing any obstacles or obstructions. Ensure safe access to the work zone. If working with concrete, create a recess using a masonry drill and hammer drill.
- Install Junction Box: Install a weatherproof junction box near the light fixture location. This box houses the electrical connections and protects them from moisture.
- Run Electrical Wiring: Run the electrical wiring from the circuit breaker box to the junction box. Utilize appropriate cable types, such as THWN or UF wire, for outdoor installations.
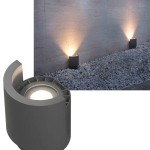
- Mount the Fixture: Secure the recessed light fixture in the prepared recess. Ensure the fixture is level and properly aligned. Depending on the fixture and installation location, you may need to use fasteners or adhesive.
- Connect Wiring: Connect the electrical wiring from the junction box to the fixture. Use a wire stripper to expose the wire ends and connect them according to the fixture's wiring diagram. Ensure proper grounding connections.
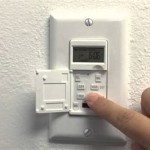
- Test Functionality: Once the wiring is complete, test the fixture by turning on the power. Verify that the light is on and functioning properly. If necessary, adjust the fixture position or wiring connections.
- Install Trim Ring: Install the trim ring around the fixture to create a flush and aesthetically pleasing finish. The trim ring conceals the wiring and provides a clean appearance.
Additional Considerations
Beyond the core installation steps, several additional factors warrant attention:
- Safety Precautions: Always take precautions during electrical work. Disconnect the power to the circuit before working with live wires. Wear safety glasses, gloves, and insulated tools to prevent electrical shock.
- Waterproofing and Sealing: Ensure the recessed lighting is properly waterproofed and sealed. Use appropriate sealant or gasket material around the fixture to prevent water intrusion.
- Maintenance: Regularly inspect the fixtures and wiring for signs of damage or deterioration. Clean the fixtures and lenses as needed to maintain optimal performance.
- Hiring a Professional: If unsure about the installation process or lack the necessary expertise, consider hiring a licensed electrician. Professionals can ensure a safe and compliant installation.

Outdoor Recessed Lighting Guide Tutor

8 Outdoor Recessed Lighting Ideas For Your Porch Flip The Switch

Guide To Choosing The Right Recessed Light Fixtures For Your Home Exterior

8 Soffit Lighting Ideas For Exterior Perfection Dekor

Recessed Lighting For Exterior Spaces Rensen House Of Lights

In Outdoor Recessed Lighting Pics Exterior Design Rustic

Soffit Lighting Installing Outdoor Recessed Lights

How To Install Ultra Thin Exterior Lighting All About Lights Ask This Old House

Recessed Led Down Lighting Outdoor Indoor Lights

Using Recessed Lighting In Outdoor Spaces Lightstyle Of Tampa Bay