Essential Aspects of Outdoor Motion Sensor Light Instructions
Outdoor motion sensor lights are an essential part of home security and convenience. They can deter burglars, light up dark areas, and even help you find your way around your property at night. However, in order to get the most out of your motion sensor light, it is important to follow the instructions carefully.
The instructions for your motion sensor light will typically include the following information:
- How to install the light
- How to adjust the sensitivity of the sensor
- How to set the timer
- How to troubleshoot common problems
By following the instructions carefully, you can ensure that your motion sensor light is installed properly and working correctly. This will help you get the most out of your investment and keep your property safe and secure.
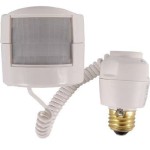
How to Install a Motion Sensor Light
The first step is to choose a location for your motion sensor light. The best location is a place where there is a lot of activity, such as a doorway, driveway, or walkway. Once you have chosen a location, you need to install the mounting bracket. The mounting bracket should be screwed into the wall or ceiling using the included screws.
Once the mounting bracket is installed, you can attach the motion sensor light. The motion sensor light should be screwed into the mounting bracket using the included screws. Once the motion sensor light is attached, you need to wire it to the power source. The power source should be a 120-volt AC outlet.
How to Adjust the Sensitivity of the Sensor
The sensitivity of the sensor can be adjusted using the included screwdriver. The screwdriver should be inserted into the hole on the side of the motion sensor light. The sensitivity can be adjusted by turning the screwdriver clockwise or counterclockwise. Turning the screwdriver clockwise will increase the sensitivity of the sensor, while turning the screwdriver counterclockwise will decrease the sensitivity of the sensor.
How to Set the Timer
The timer can be set using the included screwdriver. The screwdriver should be inserted into the hole on the bottom of the motion sensor light. The timer can be set by turning the screwdriver clockwise or counterclockwise. Turning the screwdriver clockwise will increase the time that the light stays on after it is triggered, while turning the screwdriver counterclockwise will decrease the time that the light stays on after it is triggered.
How to Troubleshoot Common Problems
If you are having problems with your motion sensor light, there are a few things that you can check. First, make sure that the light is installed properly and that the wiring is secure. Second, make sure that the sensitivity of the sensor is set correctly. Third, make sure that the timer is set correctly. If you are still having problems, you can contact the manufacturer of the light for assistance.

How To Alter The Settings On Your Pir Floodlight Security Light Sensor

Installation Instructions Pdl 140 Degrees Outdoor Motion Clipsal

120 Led Solar Security Light Black Spv Lights

Understanding Motion Lighting

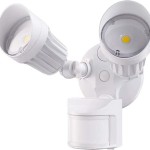
Twin Led Sensor Light

How To Adjust Your Sensor Light Metro Electrical 24 Hour Electricians

Motion Sensor Wiring Diagram Lights Outdoor

Motion Sensor Lights Super Bright Outdoor Waterproof Led Light For Garden Patio Com

Instructions

Lepro 20w Security Lights Outdoor Motion Sensor 1700 Lumen Pir Light Ip65 Waterproof Flood