Troubleshooting Outdoor Low Voltage Lights: Essential Tips and Techniques
Outdoor low voltage lights are a beautiful and energy-efficient addition to any landscape. However, like any electrical system, they can occasionally experience problems. If your low voltage lights are not working properly, there are a few key troubleshooting steps you can take to identify and resolve the issue.
Here are some essential aspects of troubleshooting outdoor low voltage lights:
1. Check the Power Source
The first step in troubleshooting low voltage lights is to check the power source. Ensure that the transformer is plugged into a working outlet and that the circuit breaker or fuse is not tripped. If the transformer is not receiving power, the lights will not illuminate.
2. Examine Wiring Connections
Loose or damaged wire connections can disrupt the electrical flow to the lights. Inspect all connections between the transformer, wires, and lights for any signs of corrosion, damage, or loose terminals. Tighten any loose connections and replace any damaged wires.
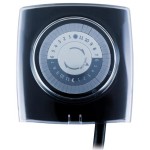
3. Test the Transformer
If the power source and wiring are in good condition, the next step is to test the transformer. Use a voltmeter to measure the voltage output from the transformer. The voltage should match the specifications printed on the transformer.
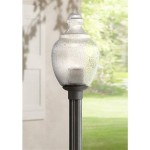
4. Check the Bulbs
Low voltage lights typically use halogen or LED bulbs. If a bulb is burned out, it will need to be replaced. To test a bulb, remove it from the fixture and connect it directly to the transformer. If the bulb does not light up, it is defective.
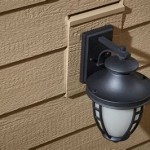
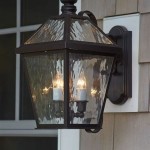
5. Inspect the Fixtures
Moisture and corrosion can damage outdoor lighting fixtures. Inspect the fixtures for any signs of damage, such as rust or loose components. Clean the fixtures with a mild detergent and water, and ensure that all components are securely fastened.
6. Check for Obstructions
Overgrown plants or debris can block the path of light from the fixtures. Trim any vegetation that may be obscuring the lights and remove any debris that may be accumulating around the fixtures.
7. Rule Out Other Issues
If you have checked all of the above factors and the low voltage lights are still not working, there may be other underlying issues, such as a malfunctioning timer, a faulty photocell, or a problem with the electrical wiring in the landscape. Consult a qualified electrician to diagnose and repair the issue.
By following these troubleshooting tips, you can effectively identify and resolve common problems with outdoor low voltage lights. Regular maintenance and inspections can help keep your low voltage lighting system functioning properly and enhance the beauty of your landscape for years to come.

Troubleshooting Low Voltage Landscape Lighting Problems Solutions

Diagnose And Repair Low Voltage Outdoor Landscape Lighting Custom Of America

Troubleshooting Low Voltage Landscape Transformer Led Systems Lighting Pro

How To Test Low Voltage Outdoor Lighting Expert

How To Fix Landscape Lights Light Not Working Troubleshooting

Deck And Patio Lighting Repair Tips

Low Voltage Outdoor Lighting Troubleshooting Abulous

Troubleshooting Low Voltage Landscape Lighting Problems Solutions

Landscape Lighting Inspection Maintenance Repair 4 Key Components

Malibu Low Voltage Transformer Installation Troubleshooting 2024