Outdoor Light Wiring Instructions
Installing outdoor lighting can enhance the beauty and functionality of your home, adding safety and curb appeal. Before starting any electrical work, ensure you have the necessary safety precautions in place. Disconnect the power supply to the circuit you are working on and double-check that the power is off using a voltage tester. Wear appropriate safety gear, including insulated gloves and eye protection. Consult a qualified electrician if you are unsure about any aspect of the wiring process.
Planning and Preparation
Before diving into the installation, it's crucial to plan and prepare. Determine the type and number of outdoor lights you need based on your desired illumination and aesthetic goals. Consider factors such as the size of the area, light intensity, and desired ambiance. Once you have a plan, gather all the necessary materials, including: *
Outdoor light fixtures:
Choose fixtures suitable for outdoor use, with appropriate weatherproofing ratings. *Electrical wire:
Use weatherproof outdoor-rated wire with the correct gauge for the circuit. *Junction box:
Ensure the junction box is rated for outdoor use and has sufficient space for all connections. *Ground fault circuit interrupter (GFCI):
Install a GFCI for safety, particularly for outdoor circuits. *Wire connectors:
Use appropriate connectors for the wire gauge and type. *Tools:
Including a wire stripper, voltage tester, screwdriver, drill, and wire cutters.Installing the Outdoor Light Fixtures
Once you've gathered your materials and planned the location of your lights, you can begin the installation. 1.
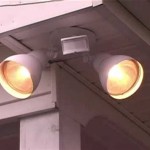
Mount the fixtures:
Carefully mount the light fixtures to their designated locations, ensuring they are level and secure. Refer to the manufacturer's instructions for specific mounting procedures. 2.Run the electrical wire:
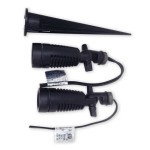
Run the electrical wire from the junction box to the light fixtures, making sure to secure the wire along its path using cable staples or clips. Keep the wire above ground by at least six inches to prevent damage and ensure proper drainage. 3.Connect the wires:
*Ground wire:
Connect the green ground wire from the fixture to the green ground wire in the junction box. *Neutral wire:
Connect the white neutral wire from the fixture to the white neutral wire in the junction box. *Hot wire:
Connect the black hot wire from the fixture to the black hot wire in the junction box. 4.Test the connections:
Before turning on the power, double-check all connections to ensure they are secure and correctly wired. 5.Turn on the power:
Once you have verified all connections, carefully turn the power back on. 6.Test the lights:
Test each light fixture to ensure it is working correctly. If any lights are not working, turn off the power, double-check the connections, and troubleshoot the issue.Outdoor Light Wiring Tips
Here are some additional tips to keep in mind when wiring outdoor lights: *
Use weatherproof wire and connectors:
Ensure all outdoor wiring and connectors are rated for outdoor use. *Install a GFCI:
A GFCI is essential for protecting against electrical shock in outdoor circuits. Install a GFCI at the beginning of the circuit, typically inside the house. *Protect wiring from damage:
Secure the wiring to prevent damage from landscaping equipment, animals, or other hazards. *Consider circuit capacity:
Ensure the circuit has enough capacity to handle the combined wattage of all the lights. *Use proper wire gauge:
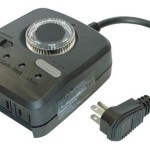
Use the correct wire gauge to prevent overheating and ensure safe operation. *Install a timer or photocell:
Consider installing a timer or photocell to automate the operation of the lights, saving energy and enhancing security. *Ensure proper drainage:
Make sure the wiring is installed in a way that allows for proper drainage. *Follow local codes:
Always follow local electrical codes when installing outdoor lighting.Remember, if you are unsure about any aspect of wiring outdoor lights, consult a qualified electrician for professional assistance. By following these instructions and taking necessary precautions, you can successfully install outdoor lighting that enhances the beauty and functionality of your home while ensuring safety and peace of mind.

Wiring Installation Coastal Source

Installation Help For Outdoor Lighting

Jim Lawrence Flush Lights Fitting Guide

Outdoor Lighting Tips From Garden Landscape

上海朗骏智能科技有限公司官网

70 Beautiful Flood Light Wiring Diagram Motion Sensor Lights Switch

Light Switch Wiring Diagram

Motion Sensor Wiring Diagram Lights Outdoor

How To Wire Wall Lights A Switch

How To Wire A Light Switch And Outside Together Ehow
Related Posts