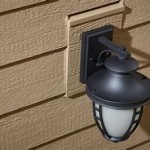
Outdoor Lamp Post Wiring: Ensuring Illumination with Safety
Outdoor lamp posts add a touch of elegance and illumination to any property, but ensuring their proper wiring is crucial for safety and functionality. This guide presents the essential aspects of outdoor lamp post wiring to help you achieve a well-lit outdoor space.
1. Safety First
Electrical work can be hazardous, so it's paramount to prioritize safety. Always consult a qualified electrician for any complex wiring tasks or if you're unsure about the process. Follow all electrical codes and regulations to prevent any accidents or damage to property.
2. Choose the Right Materials
Selecting the appropriate materials is essential for outdoor wiring. Use only weather-resistant wires rated for outdoor use. They should be designed to withstand moisture, extreme temperatures, and UV exposure. Additionally, utilize watertight connectors and junction boxes to prevent any water damage.
3. Plan the Wiring Route
Before starting the wiring process, plan the route the wires will take. Consider factors like the location of the lamp post, the power source, and any obstacles that need to be navigated. Sketch out the wiring plan to ensure efficiency and avoid any potential issues.
4. Digging the Trench
If the wires need to be buried underground, dig a trench deep enough to protect them from damage. The trench should be at least 12 inches deep and wide enough to accommodate the wires and any conduit used for protection.
5. Installing the Conduit
For added protection, it is recommended to run the wires through a conduit. The conduit should be PVC or another corrosion-resistant material. Join the conduit sections together using watertight connectors. This provides extra insulation and prevents moisture from reaching the wires.
6. Wiring Connections
Connect the wires according to the wiring diagram. Ensure the connections are secure and properly insulated to prevent any shorts or sparks. Use waterproof wire connectors or heat shrink tubing for added durability.
7. Testing the System
Once the wiring is complete, test the system before burying the trench or installing the lamp post. Turn on the power and check if the lamp post illuminates. Address any issues before proceeding with the final installation.
Conclusion
By following these steps, you can ensure the safe and proper wiring of your outdoor lamp post. Always prioritize safety, choose the right materials, plan the wiring route carefully, and test the system before final installation. With proper wiring, your outdoor lamp post will illuminate your property beautifully and safely for years to come.

How To Install A Yard Light Post Electrical Projects Home Wiring Lights

How To Install Outdoor Lamp Post Easily Step By Gui

How To Install A Lamp Post

Step By Guide In Installing An Outdoor Post Lamp

How To Install Outdoor Lamp Post Easily Step By Gui

How To Install A Lamp Post Heavy Cast Iron With Concrete Base Including Wiring

Ace Lamps On Wiring Your Lamp Post

How To Install Outdoor Lamp Post Easily Step By Gui

Installation Help For Outdoor Lighting

Hardwire Post Eye Light Control With Photocell Automatic Sensor Switch Ledwholers
Related Posts