Noma Outdoor Digital Timer Instructions
Noma outdoor digital timers are designed to automate outdoor lighting, appliances, and other electrical devices. Their convenience lies in their ability to control the timing of these devices, saving energy and providing security. However, mastering their operation requires understanding the various settings and features. This article outlines a step-by-step guide on how to use a Noma outdoor digital timer, helping you maximize its functionality.
Understanding the Timer's Components
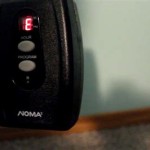
Before attempting any configuration, it is crucial to familiarize yourself with the components of the Noma outdoor digital timer. Typically, these timers feature a digital display for viewing the current time and programmed schedules. The display might include indicators for power, time, and day of the week. Other common features include:
- On/Off switch: This allows you to turn the timer on or off completely.
- Program buttons: These buttons allow you to access different programming modes and adjust the timer's settings.
- Clock setting buttons: These buttons are used to set the current time and date.
- Receptacle: This is the outlet where you plug in the device you wish to control.
By understanding the purpose of each component, you can navigate the timer's menu and settings more efficiently.
Setting the Clock and Time
Before you can program any schedules, you need to set the clock and time accurately. This ensures your timer activates your devices at the designated times. Follow these steps:
- Turn on the timer: Locate the On/Off switch and turn it to the "On" position. The digital display should now illuminate.
- Access the clock settings: Refer to your timer's instructions manual to find the specific buttons used for setting the time. These buttons are usually labelled "Hour" and "Minute".
- Set the current time: Using the hour and minute buttons, adjust the digital display until it reflects the correct time.
- Set the date: If the timer has a date setting function, use the corresponding buttons to set the day, month, and year.
It is essential to ensure your timer operates on the correct time and date for accurate scheduling.
Programming the Timer
Now that your timer is set with the correct time and date, you can program it to control your connected devices according to your desired schedule. Follow these steps:
- Enter program mode: Locate the "Program" button on your timer and press it. You might hear a beep or see an indicator light illuminate, confirming entry into programming mode.
- Select the program number: Most Noma timers allow you to set multiple programs for different days or times. Use the navigation buttons to choose the program you want to configure.
- Set the on/off times: Using the hour, minute, and day buttons, program the specific times you want your device to turn on and off. You can create a schedule for each day of the week or specify particular days.
- Save the program: Once you have set the desired on and off times, save the program by pressing the "Save" or "Enter" button on your timer.
Repeat this process for each program you want to create. Ensure you save each program to avoid losing your configurations.
Using and Troubleshooting
After programming your timer, plug the device you want to control into the timer's receptacle. The timer will automatically activate and deactivate the device based on your programmed schedules. Remember to review your programming regularly, especially during seasonal changes affecting daylight hours.
In case your timer isn't functioning correctly, troubleshoot the following:
- Power supply: Ensure the timer is plugged into a working outlet and the On/Off switch is in the "On" position.
- Battery backup: Some timers feature a battery backup for maintaining the settings during a power outage. Check the battery level and replace it if necessary.
- Programming errors: Review your programmed schedules to ensure they are correct and saved properly.
- Malfunctioning timer: If the problem persists, the timer might be faulty. Contact the manufacturer or retailer for assistance.
By adhering to these instructions and troubleshooting tips, you can ensure your Noma outdoor digital timer functions efficiently and effectively, automating your outdoor lighting and appliances to your convenience.

Noma Outdoor One On Photocell Timer Instructions

Noma Outdoor Digital Timer 20 Programmable Settings 2 Grounded S Black Canadian Tire

How To Setup Noma Timer

Mc404 Noma Outdoor Heavy Duty 24 Setting Timer 1 Partsource

Noma Digital Timer How To Set

How To Program Noma Engine Block Outdoor Timer

Noma Outdoor One On Photocell Timer Instructions

Noma Digital Timer Instructions How To Set And Use Programmable

How To Setup Noma Timer

Mc404 Noma Outdoor Heavy Duty 24 Setting Timer 1 Partsource
Related Posts