Low Voltage Outdoor Lighting DIY: Illuminating Your Landscape
Outdoor lighting significantly enhances a property's aesthetic appeal, security, and usability. Low voltage outdoor lighting offers a cost-effective and relatively simple DIY option compared to high voltage systems. Understanding the components, planning, and installation techniques is crucial for a successful low voltage outdoor lighting project.
Low voltage systems typically operate at 12 volts, powered by a transformer that steps down standard household voltage (120V or 240V). This lower voltage reduces the risk of electrical shock, making it safer for DIY installation. Furthermore, low voltage systems are generally more energy-efficient than their high voltage counterparts, resulting in lower electricity bills over time.
The scope of a DIY low voltage lighting project can vary greatly, from a few path lights to a comprehensive landscape lighting scheme. Regardless of the project's size, careful planning and diligent execution are essential for achieving the desired results and ensuring the system's longevity.
Key Point 1: Planning and Design Considerations
Before purchasing any materials, a detailed plan is paramount. This plan should encompass the desired lighting effect, the specific areas to be illuminated, and the types of fixtures needed. Consider creating a sketch of the property, marking the locations where lights will be installed. This visual aid will significantly streamline the installation process.
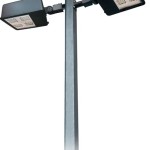
The intended purpose of the lighting drastically influences fixture selection. Path lights guide foot traffic along walkways and driveways, enhancing safety and preventing accidents. Spotlights accentuate architectural features or highlight specific plants. Floodlights illuminate larger areas for security purposes or to extend the usability of outdoor spaces after dark. Deck lights provide subtle illumination for steps and perimeters, promoting safety and creating a relaxing ambiance.
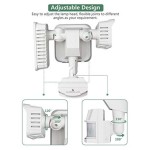
Light output, measured in lumens, determines the brightness of each fixture. Consider the surrounding environment and the desired effect when selecting fixtures with appropriate lumen ratings. Overly bright lights can create glare and disrupt the surrounding environment, while insufficient lighting can negate the desired effects. Adjustable fixtures offer greater flexibility, allowing for fine-tuning of light direction and intensity.
Color temperature, measured in Kelvin (K), affects the mood and appearance of the illuminated areas. Warmer color temperatures (2700K-3000K) create a cozy and inviting atmosphere, suitable for patios and seating areas. Cooler color temperatures (4000K-5000K) provide brighter, more natural illumination, often used for security lighting or highlighting architectural details. Choosing a consistent color temperature throughout the system creates a unified and aesthetically pleasing effect.
Wiring gauge and voltage drop are critical factors to consider during the planning phase. Voltage drop occurs when the voltage decreases over the length of the wire due to resistance. This can result in dimmer lights at the end of the run. Using thicker gauge wire minimizes voltage drop, ensuring consistent brightness across all fixtures. Consult voltage drop charts to determine the appropriate wire gauge for the length of each run, considering the wattage of the attached fixtures.
Key Point 2: Necessary Materials and Tools
A successful low voltage lighting installation requires the right tools and materials. Gather all necessary items before commencing the project to avoid delays and ensure a smooth installation process.
The core components of a low voltage lighting system include:
- Transformer: Steps down the household voltage to 12V. Choose a transformer with sufficient wattage capacity to power all the fixtures.
- Low Voltage Cable: Specifically designed for outdoor use, typically 12 or 14 gauge. Ensure the cable is rated for direct burial.
- Light Fixtures: Select fixtures based on the intended purpose and aesthetic preferences. Ensure the fixtures are compatible with low voltage systems.
- Connectors: Used to connect the cable to the transformer and the fixtures. Use waterproof connectors to prevent corrosion and ensure reliable electrical connections.
- Wire Stakes: Used to secure the cable in the ground.
- Timer or Photocell (optional): Enables automatic operation, turning the lights on at dusk and off at dawn or at a pre-set time.
Essential tools for installation include:
- Wire Strippers: Used to remove the insulation from the wire ends.
- Wire Cutters: Used to cut the wire to the desired length.
- Screwdrivers: Used to tighten screws on the transformer, fixtures, and connectors.
- Shovel or Spade: Used to dig trenches for burying the cable.
- Multimeter: Used to test the voltage and continuity of the wiring.
- Voltage Tester: Used to verify that the power is off before working on the electrical connections.
Selecting high-quality materials is essential for the system's longevity and performance. Opt for fixtures made from durable materials such as brass, copper, or aluminum, which are resistant to corrosion and weathering. Choose waterproof connectors and direct burial cable to protect the electrical connections from moisture and ground elements.
Key Point 3: Installation Procedure and Safety Precautions
The installation process involves several steps, each requiring careful attention to detail. Safety should be the top priority throughout the entire project. Disconnect the power supply at the circuit breaker before working on any electrical connections.
First, install the transformer in a protected location, such as near an outdoor outlet or inside a weatherproof enclosure. Ensure the transformer is properly grounded according to local electrical codes. Connect the low voltage cable to the transformer, following the manufacturer's instructions. Use waterproof connectors to ensure a secure and weatherproof connection.
Next, dig shallow trenches along the planned route for the low voltage cable. The depth of the trenches should be sufficient to protect the cable from damage, typically 6-8 inches. Lay the cable in the trenches, leaving enough slack for future adjustments or repairs. Secure the cable with wire stakes every few feet to prevent it from being accidentally pulled up.
Install the light fixtures according to the manufacturer's instructions. Connect the fixtures to the low voltage cable using waterproof connectors. Ensure the connections are secure and that the wires are properly oriented. Test each fixture after installation to verify that it is working correctly.
Bury the cable in the trenches, taking care not to damage the insulation. Backfill the trenches with soil and compact the soil to prevent the cable from settling. Position the fixtures to achieve the desired lighting effect. Adjust the angle and direction of the lights to highlight specific features or areas.
Once all the fixtures are installed and tested, connect the transformer to the power supply. Turn on the power at the circuit breaker and verify that all the lights are working correctly. Use a multimeter to check the voltage at each fixture to ensure that there is no significant voltage drop. If necessary, adjust the transformer taps to compensate for voltage drop.
Regular maintenance is crucial for ensuring the longevity and optimal performance of the low voltage lighting system. Inspect the fixtures and wiring periodically for damage or corrosion. Clean the lenses of the fixtures to maintain optimal light output. Replace any damaged or corroded components promptly.
By adhering to these guidelines, homeowners can successfully install a low voltage outdoor lighting system that enhances the beauty, security, and usability of their property. Careful planning, proper material selection, and diligent execution are essential for achieving the desired results and ensuring the system's longevity. Always prioritize safety and consult with a qualified electrician if unsure about any aspect of the installation process.

Georgeswork A Very Bright 1 Watt Diy Led Garden Light

Louie Lighting Blog Low Voltage Landscape Install

Install Landscape Lighting For Added Curb Appeal

Planning Your Low Voltage Outdoor Landscape Lighting 1000bulbs Blog

Outdoor Low Voltage Lighting Diy Family Handyman

Install Landscape Lighting For Added Curb Appeal

How To Install Low Voltage Outdoor Landscape Lighting 1000bulbs Blog

The Easiest Way To Install Low Voltage Landscape Lighting Abby Organizes

How To Install Low Voltage Outdoor Landscape Lighting The Garden Glove

Diy Low Voltage Landscape Lighting Ideas
Related Posts