Essential Aspects of Intermatic Outdoor Light Timer Instructions
Installing and operating an Intermatic outdoor light timer can enhance your home's security, convenience, and energy efficiency. Follow these essential aspects to ensure a successful installation and operation:
1. Selecting the Right Timer
Consider the number of lights you need to control, the wattage of the lights, and the desired timer functions. Intermatic offers a range of timers with various features, such as manual override, countdown function, and photocell override.
2. Wiring the Timer
Turn off the power supply before starting the installation. Connect the timer's BLACK wire to the "Line" terminal, the WHITE wire to the "Neutral" terminal, and the GREEN wire to the "Ground" terminal. Connect the lights' wires to the timer's output terminals.
3. Setting the Time
Locate the "Clock" knob on the timer and turn it to the current time. Rotate the dial clockwise until the correct hour is aligned with the arrow. Repeat for the minutes.
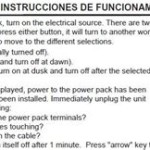
4. Programming the Timer
To program the timer, slide the "Pins" into the dial at the desired on and off times. The pins will interrupt the power supply during the off periods and restore it during the on periods.
5. Manual Override
Most Intermatic timers feature a manual override switch. Use this switch to turn the lights on or off manually without affecting the timer's schedule.
6. Photocell Override
Some Intermatic timers have a photocell override feature. This feature allows the timer to automatically adjust its on and off times based on dusk and dawn, ensuring the lights turn on when it gets dark and turn off when it gets light.
7. Daylight Saving Time (DST)
If your area observes Daylight Saving Time, adjust the timer accordingly. Most timers have a built-in DST switch that automatically adjusts the time during the spring and fall.
8. Troubleshooting
If the timer fails to operate correctly, check the following:
- Ensure the timer is receiving power.
- Verify the connections are secure and not loose.
- Check the programming pins are inserted correctly.
- Consider replacing the timer or contacting an electrician if the problem persists.
By following these essential aspects, you can confidently install and operate an Intermatic outdoor light timer, enhancing your home's security, convenience, and energy efficiency.

Model Ej500 Installation And Operating Instructions Ed Mullen Dot Net

Dt27 Digital Timer Instructions Outdoor Lighting

Intermatic Timer

How To Program The Intermatic Hb880r Outdoor Plug In Timer

Intermatic Hb880r Landscape Lighting Timer Tutorial

How To Program The Intermatic Hb880r Outdoor Plug In Timer

How To Program The Hb31k Outdoor Plug In Timer From Intermatic

How To Program The Intermatic Hb880r Outdoor Plug In Timer

How To Program The Intermatic Hb880r Outdoor Plug In Timer

Intermatic T100 Series Timers With Parts Manuals And Wiring