Essential Aspects of Installing Timer Switches for Outdoor Lighting
Outdoor lighting plays a vital role in enhancing the ambiance and security of any property. Timer switches are a convenient and energy-efficient way to automate the operation of these lights, providing numerous benefits. This guide will cover the essential aspects of installing timer switches for outdoor lighting, including selecting the right switch, wiring configurations, and troubleshooting tips.
Selecting the Right Timer Switch
The first step is to choose the appropriate timer switch for your outdoor lighting needs. Consider the following factors when making your selection:
- Power Rating: Ensure the switch can handle the wattage of your outdoor lighting fixtures.
- Programmability: Choose a switch with the desired programming options, such as daily, weekly, or customized schedules.
- Ingress Protection (IP) Rating: Select a switch with an IP rating suitable for outdoor use, typically IP44 or higher.
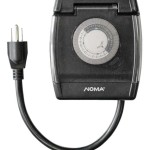
- Type: Choose between mechanical timer switches for basic operations or programmable digital switches for more advanced scheduling.
Wiring Configurations
The wiring configuration depends on the specific timer switch model and the type of outdoor lighting fixtures being used. Generally, there are two main wiring methods:
- Direct Wiring: Connect the timer switch directly to the outdoor light fixture, bypassing the existing light switch.
- Parallel Wiring: Connect the timer switch in parallel with the existing light switch, allowing manual override.
Installation Steps
Once you have selected the timer switch and determined the appropriate wiring configuration, follow these steps for installation:
- Turn off the power at the main electrical panel.
- Disconnect the existing light switch or fixture (if necessary).
- Install the timer switch according to the manufacturer's instructions.
- Connect the wires as per the wiring diagram provided with the timer switch.
- Securely mount the timer switch in an appropriate location.
- Restore power and test the operation of the timer switch and outdoor lighting.
Troubleshooting
If you encounter any issues with your timer switch, try the following troubleshooting tips:
- Check the power supply and ensure the timer switch is receiving power.
- Verify the wiring connections and ensure they are secure and correct.
- Reset the timer switch by following the manufacturer's instructions.
- Replace the light bulb or fixture in case of a blown bulb or malfunction.
Benefits of Timer Switches
Implementing timer switches for outdoor lighting offers several benefits:
- Energy Savings: Automating lighting schedules reduces energy consumption by ensuring lights are only on when needed.
- Enhanced Security: Pre-programmed lighting patterns create the illusion of occupancy, deterring potential intruders.
- Convenience: Eliminate the hassle of manually turning lights on and off, especially during irregular schedules.
- Ambiance: Create specific lighting patterns to enhance the outdoor ambiance and atmosphere.
Conclusion
Installing timer switches for outdoor lighting is a relatively simple and cost-effective way to improve the efficiency, security, and convenience of your outdoor spaces. By following the essential aspects outlined in this guide, you can successfully implement timer switches and enjoy the benefits they bring.

Easy To Install Programmable Timer The Lady Diy

Digital Timer Control Switch Connection And Working

How To Use A Digital Timer Switch For Lights

Automatic Street Light Control System Time Swicth For

How To Use Outdoor Mechanical Timer 3 Diffe Ways

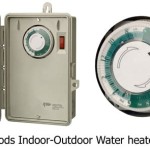
I Am To Be Wiring A Woods Indoor Outdoor Time Switch Multi Volt Model 59396 59399 30 Automatically Turn On

Trying To Install Digital Timer Outside Lights Have Two Switches Control Old Switch Has Black Common

How To Adjust Your Og Landscape Lighting Timer For Spring

Our Home From Scratch

Our Home From Scratch
