Installing Outdoor Wall Light on Siding: A Comprehensive Guide
Installing outdoor wall lights on siding can be a straightforward task with proper preparation and execution. This comprehensive guide will walk you through every step, ensuring a safe and successful installation.
Materials You'll Need:
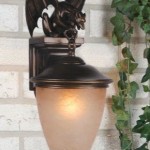
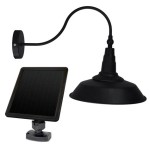
- Outdoor wall light fixture
- Electrical wire (wire gauge determined by fixture requirements)
- Wire connectors (e.g., wire nuts)
- Electrical tape
- Drill
- Phillips head screwdriver
- Level
- Safety glasses
- Stud finder (optional)
Step 1: Safety Measures
Before starting any electrical work, ensure safety by turning off the power to the circuit at the circuit breaker or fuse box. Wear safety glasses to protect your eyes from debris.
Step 2: Determine Location and Run Wiring
Plan the location of your light fixture using a level to ensure straight lines. Use a stud finder to locate studs for secure mounting. Run electrical wire from the power source to the intended location, following the stud's direction. If studs are not present, use toggle bolts for non-load-bearing wall installations.
Step 3: Mount the Junction Box
Install a weatherproof junction box at the desired location. Secure it to the siding or stud using screws or bolts provided with the box. Connect the electrical wire from Step 2 to the junction box following the manufacturer's instructions.
Step 4: Connect the Fixture
Connect the wires from the junction box to the matching wires on the light fixture. Typically, black wires connect to black wires, white wires connect to white wires, and green or bare copper wires (ground wires) connect to each other using a wire nut. Wrap electrical tape around the connections for added security.
Step 5: Secure the Fixture
Place the light fixture over the junction box and secure it using the provided screws or bolts. Ensure the fixture is firmly attached.
Step 6: Install the Bulb and Glass
Screw in the appropriate light bulb as recommended by the fixture manufacturer. Secure the glass covering or shade according to the fixture's instructions.
Step 7: Turn on the Power and Test
Turn on the power at the circuit breaker or fuse box. Check if the light fixture is working properly and makes the desired illumination level. Adjust the aiming or tilt of the fixture if necessary.
Additional Tips:
- Use weather-resistant outdoor light fixtures and wire rated for outdoor use.
- Caulk around the fixture base to prevent water infiltration.
- Consider using a photocell sensor to automatically turn the light on at dusk and off at dawn.
- Inspect and clean the light fixture regularly to maintain its functionality.
By following these steps and using caution, you can successfully install outdoor wall lights on siding and enhance the ambiance of your outdoor space.

Top Tips Replacing An Outdoor Wall Sconce Porch Daydreamer

Vinyl Siding Lights How To Mount Using A Mounting Block Diy

Exterior Light On Vinyl Siding

How To Install Outdoor Wall Lights

How To Install Outdoor Light Fixtures On A Surface Mounting Block

Replacing An Outdoor Light Fixture

How To Add A Light Fixture Vinyl Siding Electrical Box Aka J Block

How To Install A Mounting Block On Existing Vinyl Siding Upgradedhome Com

Replacing An Outdoor Light Fixture

Installing An Outdoor Wall Mounted Light Doityourself Com Community Forums
Related Posts