Installing Outdoor Lights on a Pole Barn: A Complete Guide
Pole barns are versatile and affordable structures that can be used for various purposes, such as storage, workshops, or even living spaces. Proper lighting is essential for any structure, and a pole barn is no exception. Whether you're working late into the night, hosting an event, or simply want to enhance the security of your property, having adequate outdoor lighting can make a big difference. Here's a step-by-step guide to help you install outdoor lights on your pole barn:
Step 1: Planning and Measurement:
Before you start the installation process, it's important to plan and measure the area where you want to install the lights. Determine the number of lights you need, their placement, and the height at which you want to mount them. Make sure the lights are evenly spaced and positioned strategically to provide optimal coverage.
Step 2: Choosing the Right Light Fixtures:
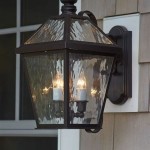
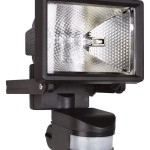
The type of light fixtures you choose will depend on your specific needs and preferences. Consider factors such as the brightness required, the color temperature, and the aesthetics of the fixtures. If you want bright, wide-angle lighting, floodlights or LED high bays may be suitable choices. If you prefer a softer, more ambient light, string lights or dusk-to-dawn lights might be better options.
Step 3: Preparing the Pole Barn:
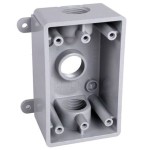
Ensure that the pole barn is properly grounded and has a reliable electrical system. If you're installing the lights on an existing pole barn, check for any existing wiring or electrical outlets that you can utilize. If not, you may need to install an electrical box or run new wiring to the desired locations.
Step 4: Mounting the Light Fixtures:
Follow the manufacturer's instructions for mounting the light fixtures securely. Typically, this involves attaching a mounting bracket to the pole barn's structure using appropriate hardware. Make sure the brackets are firmly attached and can support the weight of the light fixtures.
Step 5: Wiring and Electrical Connections:
Connect the light fixtures to the electrical system using appropriate wiring and connectors. Follow all electrical codes and safety guidelines strictly. If you're uncomfortable working with electricity, consider hiring a qualified electrician to handle this step.
Step 6: Testing and Adjustments:
Once the lights are installed and wired, turn them on to test their functionality. Check for any loose connections or flickering. If necessary, adjust the positioning of the lights or the angle of the fixtures to achieve the desired lighting effect.
Tips for Installation and Maintenance:
- Use weather-resistant light fixtures and components to withstand harsh outdoor conditions.
- Position the lights to minimize glare and light pollution.
- Regularly inspect the lights and replace any faulty bulbs or fixtures promptly.
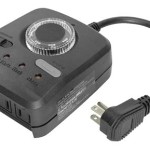
- Consider installing motion-activated lights or timers to save energy and enhance security.
By following these steps and adhering to safety guidelines, you can successfully install outdoor lights on your pole barn, improving visibility, enhancing security, and creating a more functional and inviting space.

Solution For Mounting Lights To Ribbed Exterior Surface The Garage Journal

Installing An Outdoor Wall Mounted Light Doityourself Com Community Forums

Solution For Mounting Lights To Ribbed Exterior Surface The Garage Journal

Installing An Outdoor Wall Mounted Light Doityourself Com Community Forums

Solution For Mounting Lights To Ribbed Exterior Surface The Garage Journal

Pole Barn Lighting Strategies For Beginners Fy

Steel Wall For Mounting Light Fixtures Hansen Buildings

Steel Wall For Mounting Light Fixtures Hansen Buildings

Steel Wall For Mounting Light Fixtures Hansen Buildings

Steel Wall For Mounting Light Fixtures Hansen Buildings
Related Posts
