Installing an Outdoor Light Pole: A Comprehensive Guide
Outdoor lighting is not just about illuminating your outdoor space at night but also about adding aesthetic appeal to your property. A well-installed outdoor light pole can create a safer and more inviting atmosphere while enhancing the overall curb appeal of your home. Installing an outdoor light pole may seem like a daunting task, but with the right preparation and a few simple steps, you can achieve professional-looking results. Here's a comprehensive guide to help you install an outdoor light pole on your own:
1. Select a Suitable Location: The first step is to determine the best location for your outdoor light pole. Consider factors such as the purpose of the lighting (e.g., illuminating a walkway or driveway), the height of the desired light distribution, and the proximity to existing structures and vegetation. Choose a location that provides adequate coverage while minimizing light pollution and potential hazards.
2. Dig a Base Hole: Once you have selected the location, dig a hole that is at least 24 inches deep and 12 inches wide. The depth may vary depending on local building codes and soil conditions. Ensure that the hole is deep enough to accommodate the length of the pole's base plus a few inches for drainage.
3. Prepare the Base: Place a layer of gravel or sand at the bottom of the hole for drainage. Tamp down the material firmly to create a stable base. This will prevent the pole from sinking or shifting over time.
4. Insert the Pole: Carefully insert the outdoor light pole into the hole. Ensure that the pole is straight and level. Use a level and a plumb line to check for accuracy. If necessary, adjust the base by adding or removing gravel or sand.
5. Secure the Pole: Fill the remaining space around the pole with concrete. Pour the concrete slowly and carefully, ensuring that it fills all the voids around the base. Smooth the surface of the concrete and allow it to cure for at least 24 hours before connecting the electrical wiring.
6. Install the Electrical Wiring: The electrical wiring should be handled by a qualified electrician to ensure safety and compliance with local codes. Connect the electrical wires to the light fixture at the top of the pole and run the wires down the inside of the pole. Make sure to secure the wires and use weather-resistant materials for outdoor applications.
7. Install the Light Fixture: Attach the light fixture to the top of the pole according to the manufacturer's instructions. Make sure that the fixture is securely fastened and that the bulbs are properly installed. Connect the electrical wires to the light fixture and secure all connections.
8. Finishing Touches: Once the electrical work is completed, you can add a decorative base cover or a cap to the top of the pole to enhance its appearance and protect it from the elements. Clean up any debris and ensure that the area around the light pole is safe and free of obstacles.
By following these steps carefully, you can successfully install an outdoor light pole on your own. Remember to prioritize safety, use quality materials, and follow local building codes to ensure the longevity and effectiveness of your outdoor lighting system.

How To Install Outdoor Lamp Post Easily Step By Gui

How To Install A Yard Light Post Electrical Projects Outdoor Lamp Posts Home Wiring

Step By Guide In Installing An Outdoor Post Lamp

How To Install Outdoor Lamp Post Easily Step By Gui

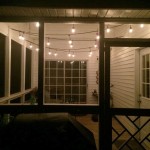
Diy Backyard String Lights Taryn Whiteaker Designs

Install A Lamp Post

How To Install Outdoor Lamp Post Easily Step By Gui

How To Install Outdoor Lighting And Diy Family Handyman

Richya Outdoor String Light Poles 2 Pack Extends To 8 Ft Three Installation Methods For Lawn Deck And Fence Hanging Lights Decor Com

Excello Global S Two 10 Ft String Light Poles Black Egp Hd 0359 The Home Depot
Related Posts

