Essential Aspects of Installing Outdoor Light Fixture Box
Installing an outdoor light fixture box is a crucial step in ensuring the proper functioning and safety of your outdoor lighting system. By following a few key steps and considering essential aspects, you can ensure a well-lit outdoor space that meets your specific needs and enhances the overall aesthetic appeal of your property.
Let's dive into the essential aspects of installing an outdoor light fixture box to help you create a well-illuminated and inviting outdoor environment.
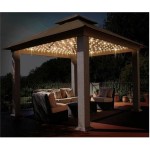
1. Selecting the Right Location: Choosing the right location for your outdoor light fixture box is crucial. Consider factors such as the intended purpose of the light (e.g., security, ambiance, or task lighting), the height of the fixture, and the proximity to power sources and other obstacles.
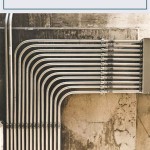
2. Preparing the Wiring: Before installing the light fixture box, ensure that the electrical wiring is properly prepared. This involves identifying the circuit breaker or fuse that will power the light fixture, running the necessary wires to the installation location, and ensuring that the wires are securely connected.
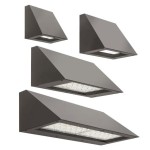
3. Mounting the Light Fixture Box: Use appropriate mounting hardware to securely attach the light fixture box to the wall or other surface. Ensure that the box is level and firmly in place to prevent any movement or wobbling of the fixture.
4. Connecting the Light Fixture: Once the light fixture box is installed, connect the light fixture according to the manufacturer's instructions. This typically involves attaching the fixture to the mounting bracket and connecting the wires to the terminals inside the box.
5. Waterproofing the Installation: Outdoor light fixture boxes are exposed to the elements, so it's crucial to ensure that they are properly waterproofed. Apply a generous amount of silicone caulk around the edges of the box and the fixture base to prevent water from infiltrating and causing damage.
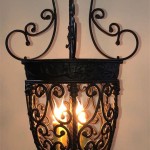
6. Adding the Finishing Touches: Complete the installation by adding the desired light bulb or LED module and the decorative cover or trim plate. Double-check that all connections are secure and that the fixture is functioning correctly.
By following these essential aspects of installing an outdoor light fixture box, you can create a safe, well-lit, and aesthetically pleasing outdoor space. Whether you're enhancing your home's curb appeal, improving security, or simply setting the mood for an evening gathering, a properly installed light fixture box will ensure that your outdoor lighting system performs optimally for years to come.

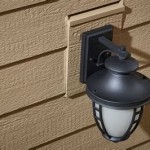
How To Install An Exterior Electrical Box For A Light Fixture On The Wood Siding

Replacing An Outdoor Light Fixture Concord Carpenter

Replacing An Outdoor Light Fixture Concord Carpenter

Replacing An Outdoor Light Fixture Concord Carpenter

How To Replace An Outdoor Light

How To Replace An Outdoor Light

How To Replace An Outdoor Light

Installing Light On Round Junction Service Box Diy Home Improvement Forum

Home Improvement How To Remove Replace Outdoor Light Fixtures Porch Driveway Etc Outside

How To Add A Light Fixture Vinyl Siding Electrical Box Aka J Block
Related Posts