Installing Outdoor Flood Lights: A Comprehensive Guide
Outdoor flood lights illuminate dark areas around your property, enhancing safety and security. Installing them may seem daunting, but with the right preparation and guidance, it's a manageable task that you can tackle yourself.
Essential Considerations
Light output: Measure the area you need to illuminate to determine the appropriate light output for your floodlight. Measured in lumens, higher lumen ratings indicate brighter lights.
Color temperature: Color temperature, measured in Kelvins (K), influences the light's appearance. Lower temperatures emit warmer, more ambient light, while higher temperatures produce cooler, more clinical light.
Beam angle: The beam angle determines the spread of the light. Narrow beams provide focused illumination, while wider beams cover larger areas.
Materials and Tools
Materials: - Floodlight fixture - Mounting bracket - Electrical wire - Wire nuts - Electrical tape
Tools: - Screwdriver - Wire strippers - Drill - Level
Step-by-Step Installation
1. Choose the Location: - Identify an appropriate mounting surface, such as a wall or eave. - Ensure the location provides clear line of sight to the desired illuminated area.
2. Mount the Bracket: - Mark the location for the bracket and drill pilot holes. - Secure the bracket to the surface using screws.
3. Prepare the Electrical Wire: - Strip the ends of the electrical wire approximately 1/2 inch. - Twist the ends together, forming a loop for connecting to the terminal.
4. Connect the Wires: - Turn off power to the circuit at the breaker panel. - Connect the black wire from the floodlight to the black wire from the power source. - Connect the white wire from the floodlight to the white wire from the power source. - Connect the ground wire (usually bare or green) from the floodlight to the ground wire in the electrical box.
5. Secure the Connections: - Twist together the connected wires and secure them with wire nuts. - Wrap electrical tape around the wire nuts to insulate them.
6. Mount the Floodlight: - Position the floodlight over the bracket and align it. - Tighten the screws to secure the floodlight in place.
7. Restore Power: - Return to the breaker panel and turn on the power to the circuit. - Test the floodlight to ensure it's functioning properly.
Tips for Success
- Use a level to ensure the floodlight is mounted straight.
- Keep electrical connections dry and protected.
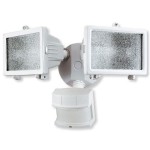
- Consider using motion sensor floodlights to save energy.
- Avoid pointing the floodlight directly at windows or into areas where it may cause glare.

How To Install Flood Lights With Pictures Wikihow

How To Install Outdoor Floodlights True Value

How To Install Led Flood Lights Tips And Tricks For A Successful Diy Project Simple Lighting Blog

How To Install Flood Lights With Pictures Wikihow

How To Install Flood Lights

How To Wire A Led Flood Light

Electrical Wiring From A Photocell To An Outdoor Led Floodlight Or Reflector 110v Devices

How To Replace An Exterior Flood Light With Motion Sensor

Comparing 3 Ways To Install Fl28 Led Flood Light Driver Box Agc Lighting

Commercial Led Flood Lights Manufacturer Whole
Related Posts
