How to Wire an Outdoor Power Socket
Installing an outdoor power socket adds convenience and functionality to any outdoor space. Whether powering landscape lighting, electric grills, or other outdoor appliances, a properly installed weatherproof outlet is essential. This guide provides a comprehensive overview of the process, emphasizing safety and adherence to electrical codes. Always consult local regulations and consider professional assistance for complex installations.
Planning and Preparation
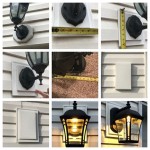
Before beginning any electrical work, ensure the power is turned off at the breaker box controlling the circuit. Double-check with a non-contact voltage tester to confirm the absence of electricity. Planning the location of the outdoor socket is crucial. Choose a spot that is both convenient and protected from the elements. The National Electrical Code (NEC) mandates the use of weatherproof, Ground Fault Circuit Interrupter (GFCI) protected receptacles for outdoor installations. These specialized outlets offer protection against electrical shocks, especially in damp environments.
Determine the power requirements of the devices intended to be used with the outdoor socket. This information dictates the appropriate wire gauge and circuit breaker amperage. Using undersized wiring can lead to overheating and potential fire hazards. Consult the NEC or a qualified electrician to ensure the correct wire size is selected. Gather the necessary tools and materials. These typically include weatherproof electrical boxes, GFCI receptacles, wire connectors, wire strippers, electrical tape, a screwdriver, and a drill.
Running the Electrical Cable
The method for running the electrical cable depends on the existing wiring infrastructure. One common method is to extend an existing indoor circuit. This requires carefully drilling through exterior walls and running the cable through conduit to protect it from damage. Conduit is typically made of PVC or metal and is essential for protecting the wiring from moisture, pests, and physical impacts. Secure the conduit appropriately to prevent movement.
Another approach involves running a new circuit directly from the main electrical panel. This method requires more extensive electrical work and may necessitate professional assistance. Regardless of the method chosen, ensure the cable is rated for outdoor use and buried at the appropriate depth if necessary. Consult local building codes for specific requirements regarding cable burial depth and conduit usage.
When running the cable, avoid sharp bends and ensure it's properly supported along its path. Proper cable routing prevents strain on the wires and ensures long-term reliability. Leave adequate slack at both ends of the cable to facilitate connections within the electrical boxes.
Wiring the GFCI Outlet and Connections
With the cable run and the electrical box securely mounted, the next step is to wire the GFCI receptacle. Carefully strip the outer sheath and individual wire insulation, exposing the correct amount of copper for the connections. Follow the instructions provided with the GFCI receptacle for proper wire termination. Typically, the black (hot) wire connects to the brass screw, the white (neutral) wire connects to the silver screw, and the bare copper (ground) wire connects to the green screw.
Ensure all connections are secure and that no exposed copper is visible outside the wire connectors. Proper grounding is essential for safety. If the outdoor socket is the end of the circuit, connect the wires directly to the GFCI receptacle. If it's part of a series of outlets, use the “line” terminals on the first GFCI receptacle and the “load” terminals to connect to subsequent outlets downstream. This allows all downstream outlets to be protected by the single GFCI device.
After wiring the GFCI receptacle, carefully tuck the wires into the electrical box and secure the receptacle to the box. Ensure the cover plate is weatherproof and properly sealed to prevent moisture ingress. Test the GFCI functionality by pressing the “test” button. The receptacle should trip, and the “reset” button should pop out. Press the “reset” button to restore power. Finally, turn the power back on at the breaker box and test the outlet with a device.
Safety Considerations
Throughout the entire process, prioritize safety. Always double-check that the power is off before working on any electrical connections. Use appropriate personal protective equipment, such as gloves and safety glasses. If unsure about any aspect of the installation, consult a qualified electrician. Incorrect wiring can lead to serious hazards, including fire and electric shock. Adhering to local electrical codes and best practices is paramount for a safe and functional outdoor power socket.

How Do You Install The Mk Marsterseal Plus Outdoor Sockets

Installing An Outdoor Socket

How To Work With An Outdoor Power Socket

Installation Of Indoor And Outdoor Sockets My Trusted Expert

How Do You Install The Mk Marsterseal Plus Outdoor Sockets

Outdoor Socket Installation Cost 2024 How Much To Fit One

Outdoor Socket Installation Rml Electrical

Inside The Socket Wall Sockets Usb Outdoor Explained

Everything To Know About Installation Of Outdoor Plug Socket

How Much Does It Cost To Install Outdoor Socket In 2024 Checkatrade