How to Wire Outdoor Lighting: Essential Aspects for a Brilliantly Illuminated Landscape
Wiring outdoor lighting is a crucial aspect of enhancing your home's aesthetic appeal and creating a safe and inviting ambiance. With careful planning and attention to detail, transforming your outdoor space into an illuminated haven becomes a rewarding experience.1. Determine Lighting Needs and Choose Fixtures
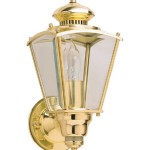
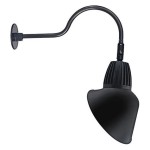
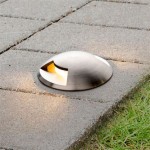
Start by assessing your lighting requirements. Consider the areas you want to illuminate, such as walkways, patios, driveways, and architectural features. Determine the type of lighting fixtures that best suit your needs and aesthetic preferences. Outdoor lights come in various styles, from lanterns and path lights to floodlights and string lights.
2. Select the Right Wiring Method
There are two primary wiring methods for outdoor lighting: direct burial and conduit. Direct burial involves running wires underground, while conduit involves running wires through protective pipes. Choose the method that best suits your landscape and the local building codes. If you're unsure, consult a qualified electrician for advice.
3. Plan the Wiring Layout
Create a sketch of your outdoor space and mark the locations of light fixtures, transformers (if necessary), and wires. This plan ensures an organized and efficient wiring process. Remember to consider distances, obstacles, and the placement of power sources.
4. Prepare the Wiring Materials
Gather the necessary materials, including outdoor-rated electrical wire, connectors, wire nuts, and a transformer if required. Ensure that the wire gauge is appropriate for the wattage of the light fixtures and the length of the wiring run. Use heavy-duty materials designed for outdoor use to withstand weather conditions.
5. Install the Wiring
Follow the wiring layout and start installing the wiring. For direct burial, dig trenches deep enough to protect the wires from damage. For conduit, run the wires through the pipes and secure them with straps. Use wire connectors and wire nuts to join wires and make connections.
6. Test the Lighting System
Before connecting to the power source, test the lighting system with a voltage tester to ensure all connections are secure and the fixtures are functioning correctly. This step eliminates potential issues and ensures a safe and reliable lighting system.
7. Connect to the Power Source
Carefully connect the wiring to the power source, whether it's a junction box or a dedicated circuit breaker. Use a UL-listed outdoor-rated junction box for all connections. Ensure that the connections are secure and weatherproof.
8. Troubleshooting and Maintenance
After installation, monitor the lighting system for any issues and address them promptly. Regularly inspect connections, replace bulbs as needed, and clean fixtures to maintain optimal performance and extend their lifespan.
By following these essential aspects, you can confidently wire your outdoor lighting and create a stunning and functional outdoor ambiance. Remember to prioritize safety, use high-quality materials, and consult a professional electrician if you lack the necessary skills or experience.
Installation Help For Outdoor Lighting

Wiring Installation Coastal Source

Outdoor Low Voltage Lighting Diy Family Handyman

How To Install Low Voltage Outdoor Landscape Lighting The Garden Glove

How To Install Low Voltage Outdoor Landscape Lighting The Garden Glove

How To Wire Outdoor Low Voltage Lighting Part 2

How To Wire Outdoor Low Voltage Lighting Part 3

How To Install Outdoor Lighting And Home Electrical Wiring Diy

The Easiest Way To Install Low Voltage Landscape Lighting Abby Organizes

Choosing Low Voltage Lighting Transformers Cable And Wire Connectors In Lite Outdoor
Related Posts
