How to Wire Outdoor Landscape Lights: A Comprehensive Guide
Illuminating your outdoor landscape not only enhances its aesthetics but also provides safety and security. Wiring outdoor landscape lights can seem daunting, but with proper planning and attention to detail, it can be a manageable task. Here's a comprehensive guide to help you wire your landscape lights like a pro:
1. Plan the Layout:
Before you start wiring, it's crucial to plan the layout of your landscape lights. Determine how many lights you need, where they will be placed, and the desired spacing between them. Consider the height of the fixtures, the type of light bulbs or LEDs to use, and the power source available.
2. Choose the Right Wire:
The choice of wire depends on the voltage and wattage of your lighting system. For low-voltage systems (12-24V), use 12/2 or 14/2 cable. For high-voltage systems (120V), use 12/2 or 14/3 cable. The number of conductors in the cable (2 or 3) determines the number of lights that can be connected to a single circuit.
3. Install the Transformer (Low-Voltage Systems Only):
Low-voltage systems require a transformer to convert the incoming line voltage (120V) to the lower voltage required by the lights (12-24V). Place the transformer in a dry, accessible location and connect it to the power source.
4. Run the Main Line:
The main line is the primary cable that connects the transformer to the lights. For low-voltage systems, bury the main line at least 6 inches deep in the ground using conduit or trenching. For high-voltage systems, run the main line through conduits or along the surface of walls or fences.
5. Connect the Lights:
Connect the landscape lights to the main line using waterproof connectors. Ensure that the connections are secure and protected against moisture and corrosion. Use branch connectors to connect multiple lights to a single circuit, but do not exceed the maximum wattage allowed for the wire gauge.
6. Install the Fixtures:
Once the lights are wired, install them in their designated locations. Use stakes or anchors to secure the fixtures firmly in the ground. Adjust the height and angle of the lights to create the desired lighting effect.
7. Connect to the Power Source:
Finally, connect the main line to the power source, either at the transformer (for low-voltage systems) or at the electrical panel (for high-voltage systems). Turn on the power and check if all the lights are functioning correctly.
Additional Safety Tips:
- Always turn off the power before working on the electrical system.
- Use waterproof connectors and bury wires underground to prevent electrical hazards.
- Install lights on stable surfaces to avoid tripping or accidents.
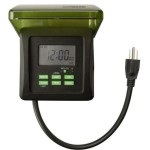
- Consider using motion sensors or timers to automate lighting and save energy.
- Have your electrical system inspected and maintained periodically by a qualified electrician.
By following these steps, you can ensure that your outdoor landscape lighting system is safe, reliable, and visually appealing. Illuminate your outdoor spaces and enjoy the beauty and functionality of your landscape after sunset.

Wiring Installation Coastal Source

How To Wire Outdoor Low Voltage Lighting Part 2

How To Install Low Voltage Outdoor Landscape Lighting The Garden Glove

The Easiest Way To Install Low Voltage Landscape Lighting Abby Organizes

Outdoor Low Voltage Lighting Diy Family Handyman

How To Install Low Voltage Outdoor Landscape Lighting

How To Install Low Voltage Outdoor Landscape Lighting The Garden Glove

Landscape Lighting Installation In 20 Min Diy Low Voltage Floodlights

Reegold Low Voltage Outdoor Landscape Lights 6 Pack Inspired Fire And Water Features

Installing Outdoor Landscape Lighting Home Repair Tutor

