How To Test Outdoor Light Sensors
Outdoor light sensors, also known as photocells or photocontrols, are integral components of many outdoor lighting systems. They automate lighting by switching lights on at dusk and off at dawn. Testing these sensors ensures they function correctly, saving energy and maintaining proper illumination. This article details several methods for effectively testing outdoor light sensors.
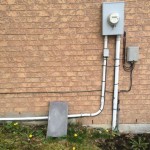
1. Visual Inspection
Before delving into functional tests, a visual inspection can often reveal obvious issues. Check the sensor for signs of physical damage, such as cracks, loose wiring, or insect infestations. Dirt, dust, and debris can also obstruct the sensor's lens, hindering its ability to detect light levels accurately. Cleaning the lens with a soft cloth can often resolve sensitivity issues. Inspect the wiring connections for tightness and corrosion. Loose or corroded wires can disrupt the flow of electricity, leading to malfunction.
2. Direct Sunlight Blocking Test
This test mimics nighttime conditions to trigger the sensor's activation. During daylight hours, locate the sensor and cover it completely. An opaque material like thick cardboard, a dark cloth, or even your hand can be used. If the sensor is functioning correctly, the connected light fixture should illuminate within a few seconds of being covered. Remove the cover. The light should turn off after a short delay as the sensor detects the ambient light. This test provides a quick and straightforward way to assess basic functionality.
3. Simulated Dusk Test using a Dark Box
For a more controlled test, a dark box or container can simulate changing light conditions. Place the sensor inside the box, ensuring no ambient light can enter. The connected light fixture should turn on. Gradually introduce light into the box by creating small openings or using a dimmer switch with a separate light source. As light enters, the sensor should eventually turn the connected light off. This method allows for observing the sensor's response to gradual light level changes and can help pinpoint sensitivity issues.
4. Multimeter Test
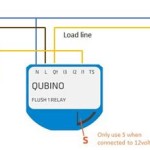
A multimeter allows for measuring the electrical output of the sensor. This method requires basic electrical knowledge and caution. Before starting, ensure the power to the lighting circuit is turned off for safety. Disconnect the sensor’s wiring and set the multimeter to measure resistance (ohms). Connect the multimeter probes to the sensor's terminals. In darkness, the resistance should be low, indicating current flow. Expose the sensor to light. The resistance should increase significantly, indicating the sensor is reacting to the light and interrupting the circuit. This test provides a more precise measurement of the sensor's performance.
5. Light Meter Test
Utilizing a light meter in conjunction with the multimeter test provides even greater precision. A light meter measures the ambient light level in lux or foot-candles. Begin by measuring the ambient light level at which the light fixture normally activates. This measurement serves as a baseline. Cover the sensor and measure the resistance with the multimeter as described in the previous method. Repeat this process at different light levels by covering the sensor to varying degrees. Compare the resistance readings at different light levels to the measured lux values. This detailed analysis helps determine the sensor's sensitivity and responsiveness to specific light levels. This method is particularly useful for troubleshooting sensors that seem to activate at inconsistent light levels.
6. Testing with a Variable Resistor
A variable resistor, also known as a potentiometer, can simulate different levels of light exposure on the sensor. This test requires some electronics experience and careful manipulation. After disconnecting the power supply, connect the variable resistor in series with the sensor. By adjusting the resistance of the potentiometer, you can simulate changes in light levels and observe the sensor's response. Monitor the connected light fixture to see when it turns on and off. This method allows for fine-tuning the sensitivity test by mimicking specific resistance changes that the sensor would typically experience under varying light conditions.
7. Observing Performance over Several Days
While the previous methods offer immediate results, observing the sensor’s performance in its natural environment over multiple days provides valuable insight into its long-term functionality. Note the times at which the light turns on and off each day. Compare these observations to the expected sunrise and sunset times. Significant discrepancies may indicate a faulty sensor or incorrect sensitivity settings. This method helps detect intermittent issues that might not be apparent during shorter tests.

Light Sensor Test Trouble Shooting

Light Sensor Test Trouble Shooting

Motion Sensor Lights Tips To Reset Detector

How To Adjust Your Sensor Light Metro Electrical 24 Hour Electricians

How To Reset Outdoor Motion Sensor Lights Electronicshub

How To Test Settings On A Motion Light Ehow

How To Install Security Lights Diy Family Handyman

How To Reset A Motion Sensor Light Local Electrical Group

Light Sensor Test Trouble Shooting

How Do You Test A Motion Sensor Light 7 Steps To Follow