How to Set Up a Timer for Outdoor Lights
Outdoor lighting enhances the safety and aesthetics of a property. However, leaving lights on continuously can lead to significant energy consumption and increased utility bills. Implementing a timer for outdoor lights provides a practical solution to manage energy usage while maintaining the desired level of illumination for security and ambiance. This article details the process of setting up a timer for outdoor lights, covering various types of timers and providing a step-by-step guide for installation and programming.
Understanding the Types of Outdoor Light Timers
The market offers a variety of outdoor light timers, each with its functionalities and suitability for different setups. Selecting the appropriate timer is crucial for ensuring optimal performance and ease of use.
Mechanical Timers: Mechanical timers are the most basic and cost-effective option. They feature a rotating dial with pins or trippers that can be pushed in or pulled out to set on and off times. These timers operate without electricity, making them suitable for simple lighting setups. They are generally less precise than digital timers, and their settings may drift slightly over time.
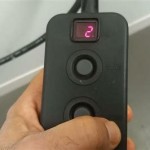
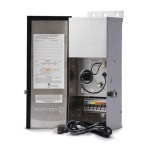
Digital Timers: Digital timers offer greater precision and flexibility compared to mechanical timers. They typically feature a digital display and buttons for programming on and off times. Some digital timers also offer advanced features such as multiple on/off settings per day, dusk-to-dawn functionality, and random settings to simulate occupancy. They require a power source to operate, either through direct wiring or battery backup.
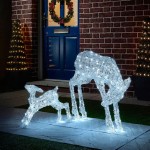
Photocell Timers: Photocell timers, also known as light-sensitive timers, use a light sensor to detect ambient light levels. They automatically turn on the lights at dusk and off at dawn, eliminating the need for manual programming. These timers are ideal for security lighting and landscape lighting where consistent dusk-to-dawn operation is desired. Some photocell timers also include a timer function to turn off the lights after a set period.
Smart Timers: Smart timers represent the advanced option. They offer remote control and programming capabilities through a smartphone app or web interface. Smart timers can be integrated with other smart home devices and systems, such as voice assistants and home automation platforms. They typically offer features like geofencing, scheduling based on sunrise/sunset times, and energy usage monitoring. Smart timers require a Wi-Fi connection to operate remotely.
Preparing for Timer Installation
Before installing a timer for outdoor lights, certain preparatory steps are necessary to ensure a safe and efficient installation process.
Safety Precautions: Prioritize safety by turning off the power to the circuit that controls the outdoor lights at the circuit breaker. Use a voltage tester to confirm that the power is off before proceeding with any wiring. Wear appropriate safety gear, such as insulated gloves and eye protection.
Gathering Tools and Materials: Assemble the necessary tools and materials, including a screwdriver set, wire stripper, wire connectors, electrical tape, and the chosen outdoor light timer. If replacing an existing timer, ensure that the new timer is compatible with the voltage and wattage requirements of the existing lighting circuit.
Reviewing Instructions: Thoroughly read the manufacturer's instructions that come with the timer. The instructions provide specific wiring diagrams and programming steps for the particular timer model. Following the instructions carefully is crucial for proper installation and operation.
Assessing the Wiring: Examine the existing wiring configuration to identify the hot wire, neutral wire, and ground wire. The hot wire is typically black, the neutral wire is white, and the ground wire is green or bare copper. If the wiring is unfamiliar, it is recommended to consult a qualified electrician.
Step-by-Step Installation Guide
The installation process varies depending on the type of timer and the existing wiring configuration. The following steps provide a general guide for installing an outdoor light timer.
Replacing an Existing Timer:
- Turn off the power to the circuit at the circuit breaker.
- Remove the faceplate and mounting screws of the existing timer.
- Carefully pull the timer out of the electrical box.
- Disconnect the wires from the existing timer, noting the wire connections.
- Connect the wires to the new timer according to the wiring diagram provided in the manufacturer's instructions. Use wire connectors to secure the connections.
- Carefully push the new timer back into the electrical box.
- Secure the timer with mounting screws and replace the faceplate.
- Turn the power back on at the circuit breaker.
- Program the timer according to the manufacturer's instructions.
Installing a Timer from Scratch:
- Turn off the power to the circuit at the circuit breaker.
- Install an electrical box at the desired location for the timer.
- Run electrical wiring from the power source to the electrical box.
- Connect the wires to the timer according to the wiring diagram provided in the manufacturer's instructions. Use wire connectors to secure the connections.
- Secure the timer in the electrical box with mounting screws and replace the faceplate.
- Turn the power back on at the circuit breaker.
- Program the timer according to the manufacturer's instructions.
Wiring Considerations: When wiring the timer, ensure that the wire connections are secure and properly insulated. Use wire connectors that are appropriate for the wire gauge and type. Wrap the wire connectors with electrical tape for added insulation. If the timer requires a neutral wire, connect it to the neutral wire in the electrical box. If the timer requires a ground wire, connect it to the ground wire in the electrical box.
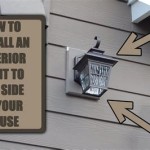
Outdoor-Rated Enclosures: When installing a timer outdoors, use an outdoor-rated enclosure to protect the timer from the elements. The enclosure should be waterproof and UV resistant to prevent damage to the timer. Ensure that the enclosure is properly sealed to prevent water from entering.
Programming and Testing the Timer
After installing the timer, programming it according to the desired settings is essential. The programming process varies depending on the type of timer.
Mechanical Timers: Program mechanical timers by pushing in or pulling out the pins or trippers on the rotating dial to set the on and off times. Each pin or tripper represents a specific time interval. Rotate the dial to the current time and test the timer to ensure that the lights turn on and off at the set times. Adjust the pins or trippers as needed to achieve the desired settings.
Digital Timers: Program digital timers using the buttons and display. Consult the manufacturer's instructions for specific programming steps. Typically, programming involves setting the current time and date, and then entering the desired on and off times. Some digital timers offer advanced features such as multiple on/off settings per day, dusk-to-dawn functionality, and random settings. Test the timer to ensure that the lights turn on and off at the set times. Adjust the settings as needed.
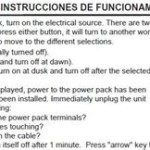
Photocell Timers: Photocell timers automatically turn on the lights at dusk and off at dawn. No programming is typically required. However, some photocell timers offer a timer function to turn off the lights after a set period. Consult the manufacturer's instructions for programming the timer function. Test the timer to ensure that the lights turn on at dusk and off at dawn, or after the set period.
Smart Timers: Program smart timers using a smartphone app or web interface. Download the app and follow the instructions to connect the timer to the Wi-Fi network. Once connected, program the timer using the app's scheduling features. Smart timers often offer advanced features such as geofencing, scheduling based on sunrise/sunset times, and energy usage monitoring. Test the timer to ensure that the lights turn on and off at the set times. Adjust the settings as needed using the app.
Testing and Troubleshooting: After programming the timer, test it thoroughly to ensure that the lights turn on and off at the desired times. Observe the lights over a period of several days to confirm that the timer is functioning correctly. If the lights do not turn on or off at the set times, check the wiring connections, the timer settings, and the circuit breaker. Consult the manufacturer's instructions for troubleshooting tips. If the problem persists, it is recommended to consult a qualified electrician.
Maintaining the Timer: Regularly inspect the timer and the wiring connections to ensure that they are in good condition. Clean the timer with a soft, dry cloth to remove dust and debris. If the timer is exposed to harsh weather conditions, consider using a protective cover to extend its lifespan. Replace the timer if it becomes damaged or malfunctions.
Implementing a timer for outdoor lights offers a practical and efficient way to manage energy consumption and enhance the security and aesthetics of a property. By understanding the different types of timers, preparing for installation, following the step-by-step guide, and programming and testing the timer, homeowners can effectively control their outdoor lighting and realize the benefits of energy savings and improved convenience.

How To Adjust Your Timer For Daylight Savings Spring Lexington Outdoor Lighting

How To Put Outdoor Lights On A Timer Electronicshub

How To Install A Timer Switch In Outdoor Lighting Doityourself Com

How To Use A Timer Switch For Lights

Automating Outdoor Lights With A Light Switch Timer

Easy To Install Programmable Timer The Lady Diy

How Do Outdoor Light Timers Work Quora

What Kinds Of Timers Can I Use With My Lights 1000bulbs Blog

The Best Outdoor Light Timer It S A Must Have Home Gadgets Driven By Decor Repair

Ge 24 Hour Outdoor Plug In Mechanical Timer 15138 The Home Depot
Related Posts