How to Set Up Low Voltage Outdoor Lighting
Low voltage outdoor lighting is a great way to enhance the safety and beauty of your property. It can be used to illuminate pathways, highlight architectural features, and create a warm and inviting atmosphere. Installing low voltage outdoor lighting is a relatively simple project that can be completed in a weekend. Here are the essential steps to help you get started:
### 1. PlanningThe first step is to plan your lighting layout. Consider the areas you want to illuminate and the type of lighting you want to use. There are a variety of low voltage lighting fixtures available, including path lights, spotlights, and floodlights. Once you have a plan, you can determine the amount of wire and fixtures you need.
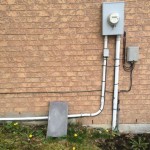
### 2. Installing the TransformerThe transformer is the heart of your low voltage lighting system. It converts high voltage electricity from your home's electrical panel into low voltage electricity that is safe for use outdoors. The transformer should be installed in a dry, well-ventilated area.
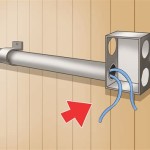
### 3. Running the WireThe next step is to run the wire from the transformer to the lighting fixtures. The wire should be buried underground or run through conduit. Be sure to follow the manufacturer's instructions for burying the wire.
### 4. Installing the FixturesOnce the wire is in place, you can install the lighting fixtures. The fixtures should be secured to the ground or to a post. Follow the manufacturer's instructions for installing the fixtures.
### 5. Connecting the WiresThe final step is to connect the wires to the fixtures. Be sure to match the colors of the wires. The positive wire should be connected to the positive terminal on the fixture, and the negative wire should be connected to the negative terminal.
### 6. Testing the LightsOnce the lights are installed, test them to make sure they are working properly. If any of the lights are not working, check the connections and make sure the transformer is turned on.
### Tips for Installing Low Voltage Outdoor Lighting- Use a landscape lighting kit. This will provide you with all of the necessary components to install your lighting system.
- Bury the wire at least 6 inches underground. This will help to protect the wire from damage.
- Use waterproof connectors. This will help to prevent the connections from corroding.
- Install the lights in a way that minimizes glare. This will help to create a more comfortable and inviting atmosphere.
- Use a timer to turn the lights on and off automatically. This will save you energy and money.
Installing low voltage outdoor lighting is a great way to improve the safety and beauty of your property. By following these simple steps, you can create a beautiful and inviting outdoor space that you can enjoy for years to come.

How To Install Low Voltage Outdoor Landscape Lighting 1000bulbs Blog

Planning Your Low Voltage Outdoor Landscape Lighting 1000bulbs Blog

How To Install Low Voltage Outdoor Landscape Lighting The Garden Glove

Outdoor Low Voltage Lighting Diy Family Handyman

The Easiest Way To Install Low Voltage Landscape Lighting Abby Organizes

How To Install Low Voltage Outdoor Landscape Lighting The Garden Glove

Install Landscape Lighting For Added Curb Appeal

What Is Low Voltage Landscape Lighting Mll Blog

3 Must Haves For Installing Low Voltage Landscape Lighting Ideas Advice Lamps Plus

The Easiest Way To Install Low Voltage Landscape Lighting Abby Organizes
Related Posts
