How to Set Up a Hampton Bay Outdoor Light Timer
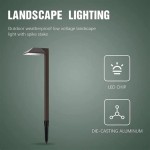
Outdoor lighting enhances the aesthetics of your home and provides security. Hampton Bay offers a range of outdoor light timers designed for easy installation and operation. Whether you want to automatically turn on your lights at dusk, set a schedule for holiday decorations, or simply conserve energy, these timers provide a convenient solution. This article outlines the steps for setting up a Hampton Bay outdoor light timer.
Identify the Timer Type and Features
Hampton Bay offers various timer models, each with unique features. Before installation, it's essential to carefully analyze the timer you've purchased. Consider the following:
- Timer Mechanism: Determine if the timer is analog or digital. Analog timers use a dial to set the on/off times, while digital timers feature a display for setting specific times and days.
- Power Source: Most Hampton Bay outdoor timers are powered by electricity, requiring a connection to an outlet. Some may have battery backup for continued operation during power outages.
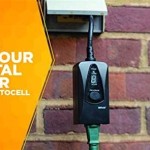
- Control Options: Some timers offer various control options, including manual override switches, photocell sensors, and remote control capabilities.
- Timer Settings: Familiarize yourself with the available timer settings. This might include options for setting specific on/off times, days of the week, or even a "sunset" setting that activates the lights at dusk automatically.
Installation Process
Once you have a clear understanding of your timer's features, follow these steps for proper installation:
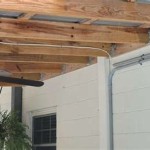
- Locate the Mounting Location: Choose a convenient and accessible spot near your outdoor lights. The location should be protected from the elements and easy to reach for future adjustments.
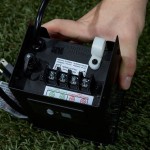
- Connect the Timer to the Electrical Source: Based on your timer's power source, connect it to a suitable outlet. This may involve plugging directly into an outdoor receptacle or connecting to a junction box.
- Connect the Light Fixture: Connect the wires from your outdoor light fixture to the corresponding terminals on the timer. Ensure proper wire connections and consult the timer's instruction manual for specific wiring diagrams.
- Secure the Timer: Once all connections are secure, mount the timer to the chosen location using the mounting brackets provided. Securely fasten the timer to prevent accidental loosening.
Programming and Operation
With the timer installed, the next step is to program it to your desired settings. Instructions for programming vary depending on the timer model, but in general, the process is intuitive:
- Switch the Power On: Turn on the power to the timer and allow it to initialize.
- Set the Time and Date: Adjust the timer's clock to match the current time and date. Use the buttons or dials provided to set the time and date accurately.
- Select the Desired Timer Settings: Use the timer's controls to program your desired on/off times, days of the week, or any other available settings.
- Test the Timer: Once the timer is programmed, test its operation by simulating different times of the day. Ensure the lights turn on and off according to your settings.
Remember to consult your specific Hampton Bay timer's instruction manual for detailed information on programming and operation. This document will provide a comprehensive guide to the timer's functions and settings.
Troubleshooting Common Issues
Although Hampton Bay outdoor light timers are designed for reliable operation, you may encounter minor issues. Here are some troubleshooting tips:
- Power Outage: If you experience a power outage, your timer may reset. Check if the timer's power supply is working properly and reprogram the settings as needed.
- Loose Connections: Ensure all wire connections to the timer and light fixture are secure. Loose connections can cause intermittent operation or prevent the lights from working altogether.
- Faulty Timer: In rare cases, the timer itself may be faulty. If you've checked the power supply and wiring connections and the timer still doesn't work, contact Hampton Bay customer support for assistance.
By following these steps and troubleshooting any minor issues, you can successfully set up and operate your Hampton Bay outdoor light timer for enhanced home security and aesthetics.

How To Setup Programing Trouble Shooting The Hampton Bay Low Voltage Lanscape Transformer

Hampton Bay Low Voltage 60 Watt Landscape Lighting Transformer With Dusk To Dawn Sensor Sl 12 Sv The Home Depot

Hampton Bay Low Voltage 600 Watt Landscape Transformer Diy 600ps The Home Depot

Hampton Bay 1 Light Black Dusk To Dawn Outdoor Wall Lantern Sconce Bpp1611 Blk The Home Depot

Landscape Lighting Replace A Transformer

Landscape Lights Not Working Solutions To 7 Common Problems

Hampton Bay Low Voltage 60 Watt Landscape Lighting Transformer With Dusk To Dawn Sensor Sl 12 Sv The Home Depot

Hampton Bay Low Voltage 200 Watt Landscape Transformer Remote Photocell Outdoor

Hampton Bay Smart 200 Watt Landscape Lighting Transformer With Dusk To Dawn Operation Powered By Hubspace Hb 1215wifi The Home Depot

The 7 Best Ways To Light Up Your Backyard Sansbury Electric