How To Set Up An Outdoor Timer
Outdoor timers are valuable tools for automating various tasks in your yard and garden. They can help you efficiently manage your watering system, control decorative lighting, or even power up a fountain or other outdoor features. Setting up an outdoor timer is generally straightforward, but the specific steps may vary slightly depending on the type of timer you have. This article will guide you through the process for common types of outdoor timers.
Choosing the Right Timer
Before setting up your outdoor timer, you need to select the right type for your needs. Here are some common options:
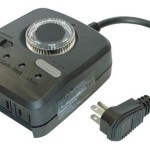
- Mechanical Timers: These are simple and affordable, often found in the form of a dial or rotary switch. They provide basic on/off scheduling.
- Digital Timers: These offer greater flexibility and control, with features like programmable settings, multiple on/off cycles, and display screens. They are more expensive than mechanical timers.
- Smart Timers: These connect to your home Wi-Fi network, allowing you to control them remotely using a smartphone app. They often have advanced features like weather-based adjustments and voice control.
- Irrigation Controllers: Specifically designed for watering systems, these timers can manage multiple zones and adjust watering schedules based on factors like rainfall and soil moisture.
Consider factors such as the complexity of your task, your budget, and the desired features when making a selection.
Setting Up a Mechanical Timer
Mechanical timers are generally straightforward to set up. Here are the basic steps:
- Choose a Location: Select a dry, protected location near the outlet where you will plug in the timer. Avoid direct sunlight or extreme temperatures.
- Connect the Timer: Plug the timer into the outlet. Then, plug the device you want to control into the timer's outlet.
- Set the Time: Locate the time setting knob or dial and adjust it to match the current time.
- Program the Schedule: Most mechanical timers have a circular dial with multiple slots representing different times of day. Align the on/off pins to the desired positions to set your schedule.
- Test the Timer: Once programmed, test the timer by manually turning it on and off. Ensure the device connected to the timer is working as expected.
Setting Up a Digital Timer
Digital timers offer more advanced features and may require a slightly different setup process:
- Locate the Power Source and Plug: Find a suitable location and plug the timer into the outlet. Then, connect the device to the timer's outlet.
- Set the Time and Date: Locate the buttons or controls to set the current time and date on the digital display.
- Program On/Off Schedules: Digital timers allow you to program multiple on/off cycles per day. Use the buttons or menu options to set your desired times and durations for each cycle.
- Choose Other Settings: Depending on the model, you may have additional settings to customize, such as:
- Days of the Week: Configure which days of the week each schedule should be active.
- Randomization: This feature can help conserve water and prevent pests by slightly varying the timing of watering cycles.
- Manual Override: This option allows you to bypass the programmed schedule and manually turn the timer on or off.
- Test the Timer: Once programmed, test the timer to ensure it is functioning according to your expectations.
Setting Up a Smart Timer
Smart timers offer the most convenience and flexibility, but they require connection to your home Wi-Fi network. Here's how to set them up:
- Connect to Wi-Fi: Locate the instructions for your specific smart timer and follow the directions to connect it to your home's Wi-Fi network. This typically involves entering your Wi-Fi password using buttons or an app.
- Download the App: Download the manufacturer's app from the App Store or Google Play Store and install it on your smartphone or tablet.
- Pair the Timer with the App: Follow the app's instructions to pair the timer with your smartphone or tablet. This typically involves entering a code from the timer into the app.
- Set Up Schedules: Use the app to create and adjust schedules for your smart timer. You can set the timing, duration, and days of operation.
- Configure Advanced Features: Many smart timers offer advanced features that can be customized through the app, such as:
- Weather-based Adjustments: These timers can automatically adjust watering schedules based on local weather conditions, reducing water waste.
- Remote Control: You can manage the timer's settings from anywhere with an internet connection.
- Voice Control: Some smart timers are compatible with voice assistants like Alexa or Google Assistant, allowing you to control them with voice commands.
- Test the Functionality: Once your smart timer is set up, test its functionality to ensure it is working as intended.
Whether you opt for a mechanical, digital, or smart timer, it's important to select a model that aligns with your needs and budget. Remember to read the manufacturer's instructions carefully and test the timer thoroughly before leaving it unattended.

How To Set A Plug Timer Mechanical Digital Switches

Programming Your Mechanical Timer

Outdoor Digital Timer How To Set Up The Programs

Outdoor Light Timer Demo Set Up And Review

How To Program The Intermatic Hb880r Outdoor Plug In Timer

How To Set A Plug Timer Mechanical Digital Switches

Noma Outdoor One On Photocell Timer Instructions

Intermatic Hb880r Landscape Lighting Timer Tutorial

Ge 24 Hour Outdoor Plug In Mechanical Timer 15138 The Home Depot

Bn Link 24 Hour Mechanical Dual Outdoor Timer
Related Posts

