How to Set Program Outdoor Light Timers
Outdoor lighting serves many purposes, from enhancing security to adding aesthetic appeal to your property. While manual control offers flexibility, a programmable outdoor light timer offers a convenient and energy-efficient way to manage your outdoor lighting. This guide will walk you through the process of setting up a programmable outdoor light timer, ensuring that your lights are always on when you need them.
1. Select the Right Timer
The first step is choosing the appropriate timer for your needs. Several types of outdoor light timers are available, each with its own features and advantages. Consider these factors when making your selection:
- Type of Timer:
- Analog Timers: Simple and reliable, often with a rotary dial for setting on/off times. Limited scheduling options.
- Digital Timers: Offer more advanced features like multiple on/off times, customizable schedules, and even astronomical settings that adjust to sunset and sunrise.
- Smart Timers: Connect to your Wi-Fi network, allowing you to control your lights remotely using a smartphone app. Often have additional features like motion sensing and weather adjustments.
- Power Source:
- Plug-in Timers: Convenient for simple installations, plugging directly into an outlet.
- Hardwired Timers: Permanently installed inside your electrical box, offering greater flexibility and potentially higher power capacity.
- Number of Outlets: Choose a timer with enough outlets to accommodate all the lights you wish to control.
- Weather Resistance: Opt for a timer rated for outdoor use, particularly if it is exposed to rain or harsh weather conditions.
2. Install the Timer
Once you have selected your timer, the next step is to install it. The installation process varies depending on the type of timer you choose:
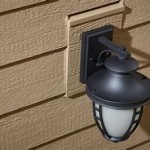
- Plug-in Timers: Simply plug the timer into an outdoor outlet and connect your light fixtures to the timer's outlets.
- Hardwired Timers: This requires some basic electrical knowledge. Disconnect the power to the circuit, remove the existing outlet cover, and carefully connect the incoming and outgoing wires to the timer's terminals. Refer to the manufacturer's instructions for specific wiring diagrams. Seek professional help if you are unsure about any part of the installation process.
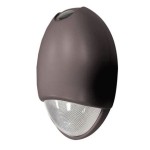
After the installation is complete, restore power to the circuit and test the timer to ensure it is working correctly. If your timer utilizes photocells, ensure they are facing the correct direction to activate the lights at dusk and deactivate them at dawn.
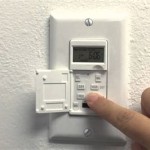
3. Program the Timer
Now comes the fun part: setting your desired schedule! The programming process will vary slightly depending on the timer model, but the general steps are similar:
- Set the Time: Use the timer's buttons or dials to match the current time. This ensures the timer operates accurately.
- Choose Program Modes: Most timers offer different modes, including:
- Automatic: Lets you set on/off times based on sunrise, sunset, or specific times of day.
- Manual: Allows you to manually turn the lights on or off. Some timers may have a manual override feature for temporary control.
- Random: Randomizes the on/off times within a set range, making it appear as if someone is home even when you are away.
- Program On/Off Times: Use the timer's buttons or dials to set the desired on and off times for your lights. You can typically program multiple on/off times within a 24-hour period.
- Test and Adjust: After setting the timer, take a few days to observe its operation to ensure the lights are turning on and off at the desired times. Make adjustments as needed to fine-tune your schedule.
Remember to consult the user manual for specific instructions on programming your particular timer model.
4. Consider Additional Features
Some programmable outdoor light timers offer advanced features that can further enhance your outdoor lighting system:
- Motion Sensing: Certain timers incorporate motion sensors that automatically activate the lights when movement is detected, providing added security and illumination for walkways. This can be particularly useful in areas where frequent access is needed, such as driveways or backyards.
- Weather Adjustments: Some smart timers can adjust the lighting schedule based on weather conditions, automatically extending the on time during cloudy days or days with limited daylight.
- Remote Control: Smart timers allow you to control your outdoor lights remotely using a smartphone app, enabling you to turn lights on or off regardless of your location. This can be a convenient feature for guests who arrive after dark or for monitoring lighting during a trip.
By carefully selecting the right timer and understanding its programming options, you can create a lighting schedule that meets your specific needs and enhances your outdoor space. Whether you are interested in maximizing energy efficiency, enhancing security, or simply adding aesthetic appeal, programmable outdoor light timers offer a convenient and effective solution.

How To Program Light Timer Mechanical Dial Face Diy

Instructions On How To Program A Simple Noma Stanley Outdoor Timer

3 Easy Automatic Porch Light Timers

Programming Your Mechanical Timer

Setup Guide In Wall Programmable Digital Timer Switch Enerlites Het01

How To Set A Light Timer The Home Depot

Setup Guide In Wall Programmable Digital Timer Switch Enerlites Het01

How To Put Outdoor Lights On A Timer Electronicshub

How To Set A Light Timer The Home Depot

How To Set Your Outdoor Lighting Timers
Related Posts