How to Set Outdoor Stake Timers
Outdoor stake timers provide a convenient way to automate outdoor lighting and other electrical devices. Properly setting these timers ensures efficient energy use and enhances the security and aesthetics of a property. This article outlines the steps involved in setting various types of outdoor stake timers.
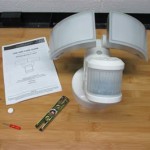
Before beginning, gather the necessary materials. This typically includes the stake timer itself, the device to be plugged into the timer (such as string lights or a water pump), and potentially a screwdriver if adjustments to the timer housing are required. Ensure the timer is compatible with the intended electrical load.
The first step is to prepare the stake timer for installation. Locate the grounding pin and ensure it is intact. This is a crucial safety feature. Next, inspect the timer housing for any damage or loose parts. If any issues are found, consult the manufacturer's instructions or replace the timer.
The next step involves setting the current time on the timer. Most stake timers have a small dial or buttons used to adjust the time. Rotate the dial or press the buttons until the current time is displayed. Pay close attention to AM/PM distinctions, if applicable. Some digital timers may require setting the day of the week. Refer to the manufacturer’s instructions for specific guidance on time setting procedures.
Programming the on/off times is the next crucial step. Stake timers offer various programming options, including daily cycles, weekly schedules, and countdown timers. For daily cycles, set the desired on and off times for each 24-hour period. Weekly schedules allow for different on/off times for each day of the week. Countdown timers operate for a specified duration and then shut off automatically.
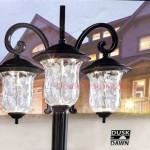
Many modern stake timers offer photocell technology, also known as "dusk-to-dawn" functionality. This feature automatically turns the connected device on at dusk and off at dawn. If utilizing this feature, ensure the photocell sensor is unobstructed and can accurately detect ambient light levels. Adjusting the sensitivity of the photocell may be possible on some models. Consult the manufacturer's instructions for specific details.
Manual override options are also typically available on stake timers. This allows users to temporarily turn the connected device on or off without affecting the programmed schedule. The override function can be useful for testing the setup or for situations requiring immediate control of the connected device.
Once the timer is programmed, connect the device to be controlled. Ensure the device is properly plugged into the timer’s outlet. Double-check the wattage rating of the timer to ensure it can handle the electrical load of the connected device. Exceeding the wattage rating could damage the timer or create a fire hazard.
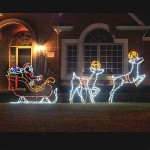
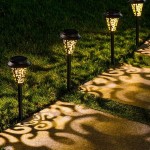
The final step is to install the stake timer in the desired outdoor location. Choose a location that provides adequate sunlight for solar-powered models or easy access to an electrical outlet for standard models. Push the stake firmly into the ground, ensuring it is stable and secure. For hard ground, consider using a garden trowel to create a pilot hole before inserting the stake.
Regular maintenance is essential for optimal performance. Periodically inspect the timer for signs of wear and tear, including loose connections, damaged housing, and debris buildup. Clean the timer housing and contacts with a dry cloth to prevent corrosion. For solar-powered timers, ensure the solar panel is clean and unobstructed to maximize solar energy collection.
Troubleshooting common issues can often be accomplished by reviewing the manufacturer's instructions. Common problems include incorrect time setting, faulty programming, and tripped circuit breakers. Check the power supply, ensure the timer is properly programmed, and verify that the connected device is functioning correctly. If the problem persists, consult a qualified electrician.
Different types of stake timers are available, catering to various needs and preferences. Mechanical timers rely on a dial and internal clockwork mechanism. Digital timers offer a more precise and versatile programming interface. Solar-powered timers utilize solar energy to charge an internal battery, eliminating the need for external wiring. Wi-Fi-enabled timers allow for remote control and programming via a smartphone app.
Safety considerations are paramount when working with electrical devices outdoors. Always ensure the timer and connected devices are rated for outdoor use. Avoid overloading the timer by connecting devices that exceed its wattage capacity. Protect the timer and connections from moisture and extreme weather conditions. If unsure about any aspect of installation or operation, consult a qualified electrician.

Outdoor Yard Stake Mechanical Timer

Ge Outdoor Stake Mechanical Timer 29972 The Home Depot

Ge Outdoor Stake Mechanical Timer 29972 The Home Depot

Bn Link 7 Day Heavy Duty Outdoor Digital Stake Timer 6 S

Bn Link Outdoor Mechanical Timer With Yard Stake 6 Grounded S Weatherproof

6 Touch Sensor Countdown Timer Stake W 6ft Cord Prime Wire Cable Inc

6 Touch Sensor Countdown Timer Stake W 6ft Cord Prime Wire Cable Inc

Mytouchsmart 6 Hour Outdoor Photocell Stake Timer With Grounded S Ft Cord 48708 The Home Depot

6 Outdoor Power Stake Timer True Value

Outdoor Power Stake Timer 6 Grounded S Mechanical For Yard Garden Etl Certified With 12 Ft Extension Cord Weatherproof Safety Cover Green Com
Related Posts