How to Set an Outdoor Lights Timer
Outdoor lighting enhances home security, provides ambiance, and extends the enjoyment of outdoor spaces. Setting a timer for outdoor lights automates their operation, conserving energy and making life more convenient. Choosing the right timer and installing it correctly are essential for optimal performance. This article explains the various types of timers available, installation techniques, and guidelines for setting the timer.
Types of Outdoor Light Timers
Several types of timers cater to different needs and preferences. These include:
- Analog Timers: These simple, affordable timers feature rotary dials that set on/off times manually. They are typically used for basic scheduling, requiring manual adjustments for seasonal changes.
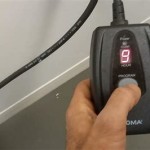
- Digital Timers: Offering more flexibility, digital timers use electronic displays for setting on/off times. Some models allow for multiple settings, while others can be programmed with specific days of the week.
- Photocell Timers: These automatic timers activate lights at dusk and turn them off at dawn, based on ambient light levels. They are particularly useful for enhancing security and energy efficiency.
- Smart Timers: Connected to a home's Wi-Fi network, smart timers allow for remote control using a smartphone app. They can be programmed with sophisticated schedules and integrated with other smart home devices for seamless control.
Installing an Outdoor Light Timer
Proper installation is crucial for the timer to work effectively and safely. The process generally involves the following steps:
- Choose the Right Location: Selecting a location that is easily accessible and protected from the elements is crucial. Ensure the timer box is appropriately sized for the wiring and components.
- Turn off Power: Safety is paramount. Before working on electrical wiring, always turn off the power to the circuit at the breaker box.
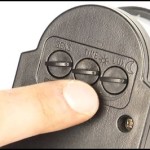
- Connect Wires: Connect the timer's wires to the existing wiring. The timer will typically have three terminals: line, load, and neutral. These should correspond to the respective wires from the power source, light fixture, and neutral wire, respectively.
- Secure the Timer: Use appropriate screws or mounting brackets to secure the timer box firmly to the wall or post.
- Turn on Power: After confirming all connections, turn the power back on and test the timer's functionality.
Setting the Outdoor Light Timer
The method for setting the timer varies depending on the model and features. Generally, these steps apply:
- Refer to the Manual: Each timer comes with instructions specific to its operation. Carefully read and understand these instructions before proceeding.
- Set On/Off Times: Adjust the dials or digital displays to set the desired on and off times for the lights. This can be done for specific days or for every day of the week.
- Test the Timer: After setting the timer, test it to ensure it functions as intended. Observe whether the lights turn on and off at the designated times.
- Adjust as Needed: Based on the test results, adjust the timer settings until the desired schedule is achieved. This may require several trials and adjustments for optimal performance.
Setting a timer for outdoor lights offers convenience, energy savings, and enhanced security. By choosing the appropriate timer type, installing it securely, and setting it correctly, homeowners can fully enjoy the benefits of automated outdoor lighting.

How To Adjust Your Timer For Daylight Savings Spring Lexington Outdoor Lighting

How To Use A Timer Switch For Lights

How To Put Outdoor Lights On A Timer Electronicshub

How To Use A Timer Switch For Lights

How To Install A Timer Switch In Outdoor Lighting Doityourself Com

How To Program An Outdoor Light Timer Quora

What Kinds Of Timers Can I Use With My Lights 1000bulbs Blog

Mytouchsmart 15 Amps 125 Volt Simple Set Outdoor Digital Timer 2 Plug In Countdown Lighting The Timers Department At Com

Noma Light Timer Instructions Hunker

How To Use A Timer Switch For Lights
Related Posts