How to Set a Noma Outdoor Mechanical Timer
Outdoor mechanical timers, like those manufactured by Noma, provide a convenient way to automate outdoor lighting and other electrical devices. Accurate timer settings ensure that lights activate and deactivate at the desired times, enhancing security and conserving energy. This guide provides a comprehensive overview of how to set a Noma outdoor mechanical timer.
Before beginning the setup process, ensure the timer is compatible with the intended application. Check the timer's specifications for maximum wattage and voltage to avoid overloading the circuit. It is also essential to ensure the device to be controlled is suitable for connection to a timer.
The first step in setting a Noma outdoor mechanical timer is to locate the current time dial. This dial, typically located on the face of the timer, represents a 24-hour clock. Rotate the dial clockwise until the arrow points to the current time. Precision in setting the current time is crucial for accurate operation.
Next, locate the timer pins or segments surrounding the time dial. These pins, often small plastic tabs, represent intervals of time, typically 15 or 30 minutes. Each pin corresponds to a specific time period on the 24-hour clock.
To set the "on" times, push the pins outward, away from the timer dial. For example, to activate a device from 7:00 PM to 11:00 PM, push out the pins corresponding to each 15 or 30-minute interval between those times. Ensure all the desired pins within that range are fully extended.
Conversely, to set the "off" times, leave the pins pushed inwards, towards the timer dial. Any time period with inward-facing pins will prevent the flow of electricity to the connected device. This allows for customized scheduling of the connected device's operation.
Once the "on" and "off" times are set, connect the timer to the outdoor power outlet. Ensure the outlet is weather-resistant and appropriately grounded for outdoor use. This is a critical safety step to prevent electrical hazards.
Plug the device to be controlled into the outlet receptacle on the timer. Verify the connection is secure. Loose connections can interrupt power flow and prevent the device from functioning as intended.
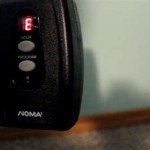
To test the timer settings, observe the indicator light, usually present on the timer's face. The indicator light should illuminate when the timer is actively supplying power to the connected device. This visual confirmation ensures the timer is functioning correctly.
Some Noma timers feature a manual override switch. This switch allows the user to bypass the timer's programming and manually control the connected device. The override switch is typically labeled "on" or "off" and provides a convenient way to operate the device outside of the programmed schedule.
It is important to consider seasonal time changes. Adjust the timer's current time dial forward one hour during daylight saving time and back one hour when daylight saving time ends. Regular adjustments ensure the timer continues to operate according to the desired schedule.
Regular maintenance can extend the lifespan of the timer. Periodically inspect the timer for signs of wear and tear, such as cracks or damaged pins. Replace the timer if any significant damage is observed. This preventative maintenance ensures continued reliable operation and minimizes potential safety risks.
Different models of Noma timers may have slightly different features and settings. Consult the manufacturer's instructions included with the specific timer model for detailed guidance. The manufacturer's instructions provide model-specific information and troubleshooting tips.
By following these steps and consulting the manufacturer’s instructions, users can effectively utilize Noma outdoor mechanical timers to automate outdoor devices, enhancing convenience, security, and energy efficiency.
Outdoor mechanical timers offer a straightforward solution for automating outdoor electrical devices. Properly setting and maintaining these timers ensures their effectiveness and longevity, providing significant benefits for homeowners and businesses.
Understanding the functionality of each component of the timer, such as the time dial, pins, and override switch, allows for precise control over the connected device's operation schedule. This level of control enables users to tailor the timer settings to their specific needs.
Safety is paramount when working with electrical devices. Always ensure the power is off at the circuit breaker before making any connections. This precautionary measure minimizes the risk of electrical shock.

Noma 24 Hour Outdoor Mechanical Timer 96 Programmable Settings 1 Grounded Black Canadian Tire

How To Setup Noma Timer

How To Set A Plug Timer Mechanical Digital Switches

How To Program Noma Engine Block Outdoor Timer

Mc404 Noma Outdoor Heavy Duty 24 Setting Timer 1 Partsource

Noma Mechanical Daily Photocell Timer With Countdown Indoor Outdoor Unboxing

How To Program Noma Engine Block Outdoor Timer

Noma 24 Hour Indoor Mechanical Timer Programmable Settings 1 White Canadian Tire

How To Set Mechanical Timer

Noma Outdoor Mechanical Lighting Timer