How To Set Noma Outdoor Light Timer
Noma outdoor light timers offer a convenient way to automate outdoor lighting schedules, enhancing security and energy efficiency. Understanding the timer's functionality and settings is essential for effective use. This guide provides a comprehensive overview of setting a Noma outdoor light timer.
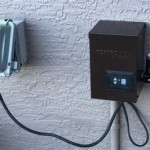
Initial Setup: Before programming the timer, ensure it's compatible with the intended light fixture. Check both the timer and light fixture's voltage and wattage ratings. Plug the timer into a grounded outdoor outlet. Then, plug the light fixture into the timer's outlet receptacle.
Understanding the Timer's Controls: Noma timers feature a variety of controls, often including dials, buttons, and a small LCD screen. The specific layout may vary by model, so consult the user manual for detailed information about your particular timer. Common features include a "Clock" button for setting the current time, "Timer" or "Program" buttons for setting on/off times, and "Mode" buttons for selecting operating modes.
Setting the Current Time: Accurate time setting is crucial for proper timer operation. Locate the "Clock" button, often indicated by a clock icon. Press and hold this button until the display begins flashing. Use the "+" and "-" buttons (or dial, depending on the model) to adjust the hours and minutes. Once the correct time is displayed, press the "Clock" button again to confirm.
Programming On/Off Times: After setting the current time, the next step is to program the desired on and off times for the connected light fixture. Locate the "Timer" or "Program" button. Press this button to access the programming mode. The display will typically show indicators for "ON" and "OFF" times.
Setting the "ON" Time: Use the "+" and "-" buttons (or the dial) to set the desired time for the light to turn on. Ensure you select AM or PM if applicable to your timer model. Press the "Timer" or "Program" button again to confirm the "ON" time.
Setting the "OFF" Time: The display will then shift to the "OFF" time setting. Use the "+" and "-" buttons (or the dial) to set the desired time for the light to turn off. Again, ensure AM or PM is correctly selected if required. Press the "Timer" or "Program" button to confirm the "OFF" time.
Multiple On/Off Times: Some Noma timers allow for multiple on/off cycles within a 24-hour period. Consult your user manual for the specific procedure. Typically, this involves repeating the "ON" and "OFF" time setting steps multiple times, often using a designated button to switch between different program slots.
Selecting Operating Modes: Noma timers typically offer different operating modes. Common modes include:
- Auto: The timer follows the programmed on/off schedule.
- On: Keeps the light permanently on, overriding the timer.
- Off: Keeps the light permanently off, overriding the timer.
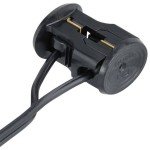
- Dusk to Dawn: Uses a built-in photocell to turn the light on at dusk and off at dawn.
Use the "Mode" button to cycle through the available modes and select the desired option.
Random Mode (if available): Some Noma timers feature a "Random" mode designed to enhance security. This mode randomly varies the on/off times within a specified range, creating the illusion of occupancy when you are away.
Daylight Saving Time (DST): Many Noma timers offer a DST setting. Ensure this setting is correctly configured to maintain the desired lighting schedule throughout the year. Typically, a dedicated "DST" button or a setting within the clock menu allows you to enable or disable DST.
Testing the Timer: After programming the timer, observe it for a full cycle to ensure it functions as intended. Verify the light turns on and off at the programmed times. If discrepancies arise, double-check the settings and consult the user manual for troubleshooting advice.
Manual Override: Most Noma timers allow for manual override, enabling you to turn the light on or off regardless of the programmed schedule. Usually, a dedicated "Manual" button or a switch on the timer itself provides this functionality.
Troubleshooting: If the timer doesn't function correctly, review the following points:
- Ensure the timer is plugged into a working grounded outlet.
- Confirm the light fixture is properly plugged into the timer.
- Verify the wattage of the light fixture does not exceed the timer's rating.
- Check that the current time and on/off times are correctly set.
- Refer to the user manual for specific troubleshooting instructions related to your model.
Safety Precautions: Always observe safety precautions when working with electrical devices. Do not exceed the timer's maximum wattage rating. Use the timer only with compatible outdoor lighting fixtures. Keep the timer and connected devices away from water and moisture.

How To Setup Noma Timer

Noma Light Timer Instructions Model Et525c Lights

Instructions On How To Program A Simple Noma Stanley Outdoor Timer

Instructions On How To Program A Simple Noma Stanley Outdoor Timer

Noma Outdoor Digital Timer 20 Programmable Settings 2 Grounded S Black Canadian Tire

Noma Outdoor One On Photocell Timer Instructions

Noma Outdoor Timer Dusk To Dawn Sensor 1 Grounded Black Canadian Tire

Noma Light Timer Instructions Hunker

Noma Mechanical Daily Photocell Timer With Countdown Indoor Outdoor Unboxing

Noma Outdoor Holiday Light Timer 4 Settings 3 Grounded S Black Canadian Tire
Related Posts