How to Set Noma Outdoor Digital Timer
A digital outdoor timer is a great way to automate your outdoor lighting, water features, and other devices. The Noma Outdoor Digital Timer is a popular choice because it is easy to use and has a number of features that make it a good value. Here is a step-by-step guide on how to set the Noma Outdoor Digital Timer:
1. Gather your materials. You will need the following items to set your timer:
- Noma Outdoor Digital Timer
- Phillips head screwdriver
- AA batteries (2)
- Outdoor device or light fixture that you want to control
2. Install batteries. Open the battery compartment on the back of the timer and insert 2 AA batteries. Make sure the batteries are inserted correctly, as shown in the battery compartment. Close the battery compartment.
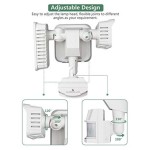
3. Mount the timer. The timer can be mounted on a wall or post using the included screws. Choose a location that is convenient for you and that will not be exposed to direct sunlight or rain.
4. Connect the timer to your device. Plug your outdoor device or light fixture into the outlet on the side of the timer. Make sure that the plug is securely inserted.
5. Set the time. Press the "Clock" button on the front of the timer. The current time will be displayed. Use the up and down arrows to set the correct time. Press the "Clock" button again to save the time.
6. Set the program. The Noma Outdoor Digital Timer has 16 different program settings. Each setting allows you to specify the start time, stop time, and duration of the program. To set a program, press the "Program" button. The current program number will be displayed. Use the up and down arrows to select the program number that you want to set. Press the "Program" button again to enter programming mode. Use the up and down arrows to set the start time, stop time, and duration of the program. Press the "Program" button again to save the program.
7. Turn on the timer. Once you have set the program, press the "On" button on the front of the timer to turn it on. The timer will now automatically turn your outdoor device or light fixture on and off according to the program that you have set.
Tips:
- If you want to change the program, simply press the "Program" button and enter programming mode. You can then use the up and down arrows to change the start time, stop time, or duration of the program.
- To turn off the timer, press the "Off" button on the front of the timer.
- The Noma Outdoor Digital Timer has a built-in backup battery that will keep the timer running for up to 24 hours in the event of a power outage.

How To Setup Noma Timer

How To Program Noma Engine Block Outdoor Timer

How To Use The Woods Noma Digital Outdoor Timer

Noma Outdoor Digital Timer 20 Programmable Settings 2 Grounded S Black Canadian Tire

Instructions On How To Program A Simple Noma Stanley Outdoor Timer

Noma Blockheatertimer

Noma Outdoor Digital Timer 140 Programmable Settings 2 Grounded S Black Canadian Tire

How To Program Noma Engine Block Outdoor Timer

Instructions On How To Program A Simple Noma Stanley Outdoor Timer

Noma Outdoor One On Photocell Timer Instructions