How to Set an Intermatic Outdoor Light Timer Switch
Intermatic outdoor light timer switches provide a convenient way to automate your outdoor lighting, enhancing security, saving energy, and extending the lifespan of your bulbs. These timers offer adjustable settings to control lighting schedules, ensuring your lights turn on and off automatically, even when you're away from home. This article will guide you through the process of setting up and configuring an Intermatic outdoor light timer switch.
Choosing the Right Timer
Before diving into the setup process, it's crucial to select the appropriate Intermatic timer for your needs. These timers come in various configurations, each designed for specific applications and features:
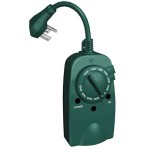
- Analog Timer Switches: These traditional timers use a rotary dial to set the time interval for on/off cycles. They are simple to use but offer limited flexibility in scheduling.
- Digital Timer Switches: Featuring an LCD display, these timers allow for more precise time settings, including multiple on/off times per day. They may also offer additional features like astronomical time settings for syncing lighting schedules with sunset and sunrise.
- Photocell Timers: These timers incorporate a light sensor that automatically turns lights on at dusk and off at dawn. They are particularly useful for security lighting and energy savings.
- WiFi-Enabled Timers: These advanced timers can be controlled remotely using a smartphone app. They offer maximum flexibility and convenience, allowing you to adjust schedules from anywhere with an internet connection.
Consider your lighting needs, desired scheduling options, and budget to determine the most suitable Intermatic timer for your outdoor space.
Installing the Timer Switch
Once you have chosen the right Intermatic timer, follow these steps for proper installation:
- Turn off the power: Before working on any electrical wiring, always disconnect the circuit breaker controlling the outdoor lighting to prevent accidental shocks.
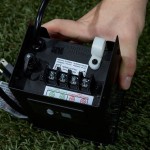
- Locate the existing wiring: Identify the wires connected to your current outdoor light fixture. Typically, you'll find a black wire (hot), a white wire (neutral), and a ground wire (usually green or bare copper).
- Connect the timer wires: Connect the timer wires (hot, neutral, and ground) to the corresponding wires in your existing wiring. The timer should come with instructions specifying how to connect the wires.
- Mount the timer: Most Intermatic timers can be mounted in a standard electrical box. Secure the timer in place and ensure that it is level.
- Restore power: After completing the wiring connections, turn the circuit breaker back on. Check that the timer is powered and operational.
Note: If you are uncomfortable working with electrical wiring, consult a qualified electrician for installation.
Setting the Timer
The procedure for setting the timer varies depending on the specific Intermatic model. However, the general principles remain consistent:
Analog Timers
- Set the current time: Rotate the dial to the current time, aligning the marker on the timer with the corresponding time on the dial.
- Select the on/off times: Use the on/off levers or switches to set the desired times for turning the lights on and off. You can typically adjust the time intervals in minutes or hours.
- Test the timer: After setting the times, manually turn the timer on and off to ensure that it operates correctly.
Digital Timers
- Set the current time and date: Use the buttons or dials on the timer to set the accurate time and date.
- Program the on/off times: Many digital timers allow you to program multiple on/off times per day. Enter the desired times using the buttons and navigate through the menu options.
- Select additional features: Some digital timers may offer features like astronomical time settings, allowing you to synchronize the lighting schedule with sunset and sunrise times.
- Save and test: After programming the settings, save them and manually test the timer to ensure that it functions as intended.
Refer to the user manual for your specific Intermatic timer model to learn about its unique features and settings.

How To Program The Intermatic Hb880r Outdoor Plug In Timer

Model Ej500 Installation And Operating Instructions Ed Mullen Dot Net

Intermatic Timer

How To Program The Intermatic Hb880r Outdoor Plug In Timer

Intermatic T100 Series 40 Amp 24 Hour Outdoor Mechanical Timer With Double Pole Single Throw Switching 240 Vac Gray T104rd89 The Home Depot

How To Install An Intermatic Timer

Intermatic Ei600wc Astronomic In Wall Timer White Bees Lighting

Butler Supply Intermatic St01 078275127562

Buy Intermatic T104 Mechanical Timer Switch 40 A 208 277 V 3 W 24 Hr Time Setting 12 On Off Cycles Per Day Cycle Gray

Intermatic 1 Min Outdoor Digital Electronic Timer Switch 02168342 Msc Industrial Supply
Related Posts