How to Run Conduit for Outdoor Lighting
Adding outdoor lighting to your home can improve security, safety, and curb appeal. But before you can install any light fixtures, you need to run conduit, which is a pipe that protects the electrical wires leading to the lights. Running conduit is a relatively simple task that can be completed in a few hours with the right tools and materials. Here's a step-by-step guide on how to run conduit for outdoor lighting:
Step 1: Plan Your Lighting Layout
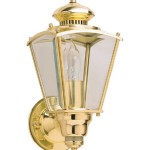
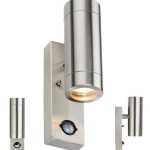
Before you start running conduit, take some time to plan your lighting layout. Decide where you want to place your light fixtures and how many lights you need. You should also consider the type of lighting you want, such as floodlights, spotlights, or path lights. Once you have a plan, you can determine how much conduit you need.
Step 2: Gather Your Materials
To run conduit for outdoor lighting, you'll need the following materials:
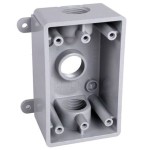
- Conduit: Use PVC or metal conduit for outdoor use.
- Conduit fittings: These include elbows, couplings, and connectors.
- Conduit hangers: Used to secure the conduit to the wall or ceiling.
- Electrical wire: Use wire that is rated for outdoor use.
- Wire connectors: These are used to connect the wire to the light fixtures.
- Tools: You'll need a saw, drill, hammer, and screwdriver.
Step 3: Install the Conduit
Start by cutting the conduit to the desired length. Then, attach the conduit hangers to the wall or ceiling where you want to run the conduit. You can use a hammer or drill to secure the hangers. Once the hangers are in place, you can attach the conduit to the hangers using the conduit fittings.
Step 4: Run the Wire
Once the conduit is installed, you can run the wire through it. To do this, you'll need to strip the insulation off the ends of the wire. Then, insert the wire into the conduit and pull it through. You can use a fish tape to help you pull the wire through the conduit.
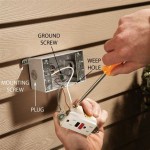
Step 5: Connect the Wire to the Light Fixtures
Once the wire is run through the conduit, you can connect it to the light fixtures. To do this, you'll need to strip the insulation off the ends of the wire again. Then, connect the wire to the terminals on the light fixture using the wire connectors.
Step 6: Test the Lights
Once the lights are connected, you can test them to make sure they work. Turn on the power and see if the lights turn on. If they don't, check the connections to make sure they are tight. You may also need to replace the light bulbs.
Step 7: Seal the Conduit
Once you're satisfied that the lights are working properly, you can seal the conduit. You can do this by applying a sealant to the gaps between the conduit and the wall or ceiling. This will help to prevent water and insects from getting into the conduit.

How To Run Electrical In Underground Conduit Outdoor Shed For Light Diy

Wiring Installation Coastal Source

How To Run Electrical Wiring Outside Family Handyman

How To Install A Yard Light Post Electrical Projects Home Wiring Lights

Running Power To An Outbuilding Fine Homebuilding

How To Install Outdoor Lighting And Solar Lights Garden

Your 4 Step Conduit Guide Jim Lawrence Blog

Your 4 Step Conduit Guide Jim Lawrence Blog

Outdoor Low Voltage Lighting Diy Family Handyman

Romex Wiring Outdoor Conduit Wesbell Electronics
Related Posts