How To Remove Outdoor Lights: A Step-by-Step Guide
Outdoor lights, whether they're mounted on walls, ceilings, or posts, can provide essential illumination for your home's exterior. However, there may come a time when you need to remove them—perhaps you're replacing them with new fixtures or repainting the surface they're attached to. Whatever the reason, removing outdoor lights is a task that can be easily accomplished with the right tools and a bit of know-how.
In this article, we'll walk you through the essential steps on how to remove outdoor lights. We'll cover everything from safety precautions to the specific tools you'll need for the job, as well as a step-by-step guide to removing different types of outdoor lights. By following these instructions carefully, you can ensure a safe and successful removal process.
Safety First: Essential Precautions
Before you start removing outdoor lights, it's essential to take proper safety precautions to prevent electrical shocks or accidents. Here are some important tips to keep in mind:
- Turn off the power to the lights at the circuit breaker or fuse box.
- Test the wires with a non-contact voltage tester to ensure there's no electricity flowing.
- Wear gloves to protect your hands from sharp edges or electrical components.
- Use a sturdy ladder or step stool to reach the lights safely.
- Have a helper assist you if necessary, especially for heavier fixtures.
Tools You'll Need
To remove outdoor lights, you'll need the following tools:
- Screwdriver (appropriate size for the light fixture)
- Wrench (for removing nuts or bolts)
- Wire cutters
- Electrical tape
- Ladder or step stool
- Non-contact voltage tester
- Gloves
Step-by-Step Guide to Removing Outdoor Lights
Once you have gathered the necessary tools and taken safety precautions, you can proceed with the removal process. The specific steps may vary slightly depending on the type of light fixture you're removing, but the general procedure is as follows:
- Turn off the power: Before touching any wires, turn off the power at the circuit breaker or fuse box.
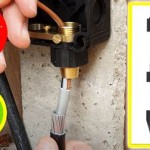
- Disconnect the wires: Locate the wires connected to the light fixture and detach them using wire cutters. Ensure that the wires are properly capped or taped to prevent electrical shocks.
- Remove the mounting screws or bolts: Use the appropriate screwdriver or wrench to remove the screws or bolts holding the light fixture in place.
- Carefully remove the light fixture: Once the mounting screws or bolts are removed, carefully pull the light fixture away from the wall or ceiling. Be mindful of any wires or connections that may still be attached.
- Clean up and patch the area: After removing the light fixture, clean up the area and patch any holes or gaps where the wires or bolts were located.
Conclusion
Removing outdoor lights is a relatively straightforward task that can be accomplished safely and efficiently by following the steps outlined in this article. By taking the necessary safety precautions, using the right tools, and carefully following the instructions, you can ensure a successful removal process.

Preparing To Paint Removing The Porch Lights

How To Replace An Outside Light

Replacing An Outdoor Light Fixture

How To Replace An Outside Light

Replacing An Outdoor Light Fixture

How To Update Or Replace A Lamp Post And Light

How To Replace An Outside Light

Replace An Outdoor Lamp Post In 5 Steps Doityourself Com

Replacing An Outdoor Light Fixture

How To Replace Outdoor Wall Light Fixture
