How to Remove Outdoor Garage Lights like a Pro
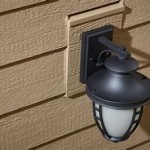
Outdoor garage lights provide illumination and security for your home but may require removal for maintenance or replacement. Removing them safely requires understanding electrical systems and following proper steps to prevent electrical shock or damage.
Safety First
Before starting, turn off the power to the light fixture at the circuit breaker or fuse box. Protect yourself by wearing gloves and safety glasses.
Disconnect the Wires
Locate the junction box where the wires connect to the light fixture. Unscrew the screws securing the cover and remove it. Inside, you will see several wires connected to the fixture.
Identify the black (hot), white (neutral), and green (ground) wires. Use a voltage tester to confirm that the wires are not live before proceeding. Disconnect the wires by loosening the screws or wire nuts holding them in place.
Remove the Fixture
Once the wires are disconnected, remove any screws or bolts holding the light fixture to the mounting bracket. Carefully pull the fixture away from the wall or ceiling, being mindful of any remaining wires.
Examine the Mounting Bracket
Inspect the mounting bracket for any damage or rust. Clean the bracket with a wire brush or sandpaper to remove any corrosion.
Prepare the New Fixture
If you are replacing the light fixture, connect the wires of the new fixture to the corresponding wires on the mounting bracket. Use wire nuts or electrical tape to secure the connections.
Install the New Fixture
Carefully lift the new fixture into place and secure it to the mounting bracket using screws or bolts. Ensure the fixture is level and firmly attached.
Reconnect the Wires
Reconnect the wires of the fixture to the wires in the junction box. Tighten the screws or wire nuts securely.
Replace the Junction Box Cover
Put the cover back on the junction box and secure it with screws. Turn the power back on at the circuit breaker or fuse box.
Test the Light
Flip the switch to turn on the light and ensure it is functioning correctly. Adjust the fixture's position or angle as needed for optimal illumination.
Additional Tips
- If you are not comfortable working with electricity, call a qualified electrician.
- Use a non-contact voltage tester to ensure the wires are not live before touching them.
- If the fixture is rusted or damaged, replace it to prevent electrical hazards.
- When installing a new fixture, use a sealant or caulk around the base to prevent moisture from entering.
- Regularly inspect and clean your outdoor garage lights to ensure safety and optimal performance.

How To Install Replace Outdoor Light Easy Simple

How To Replace An Outside Light

Replacing An Outdoor Light Fixture

How To Replace An Outdoor Light Fixture

How To Install Replace Outdoor Light Easy Simple

Replacing An Outdoor Light Fixture

Home Improvement How To Remove Replace Outdoor Light Fixtures Porch Driveway Etc Maintenance Lighting Design

Easy Outdoor Light Fixture Update 20 Minute Diy Upgrade

Can Anyone Help Me Open This Outdoor Wall Fixture To Change The Bulbs

Why My Outdoor Garage Lights Not Working Best 9 Fixtures Homely Items
Related Posts