How To Remove Outdoor Flood Light Fixture
Understanding the essential aspects of removing an outdoor flood light fixture is crucial for ensuring safety and proper maintenance. This article will delve into the critical elements that homeowners and professionals should consider when undertaking this task, providing a comprehensive guide to facilitate a successful and efficient process.
Safety Considerations: The paramount aspect of removing an outdoor flood light fixture is ensuring the safety of individuals involved in the process. This encompasses turning off the power supply at the circuit breaker or fuse box to prevent electrical shock. Additionally, wearing gloves and safety glasses is essential to protect against potential hazards such as falling debris or sharp edges.
Tools and Materials: Assembling the necessary tools and materials prior to commencing the removal process is essential. A ladder, wrench or screwdriver, electrical tape, and a multimeter for testing are typically required. Ensuring the availability of appropriate tools will expedite the process and minimize interruptions.
Disconnecting Electrical Wires: Once safety precautions are in place, the electrical wires need to be disconnected. Using the multimeter, test the wires to confirm that the power is off. Then, remove the wire nuts that connect the fixture wires to the supply wires. After separating the wires, wrap electrical tape around the ends of the supply wires for insulation.
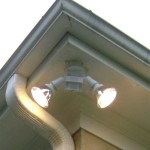
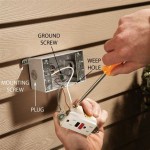
Removing the Mounting Bracket: The next step involves removing the mounting bracket that secures the flood light fixture to the exterior wall. Using the appropriate wrench or screwdriver, carefully loosen the screws or bolts that hold the bracket in place. Once loose, gently pull the fixture straight towards you to detach it from the bracket.
Cleaning and Inspection: After removing the flood light fixture, take the opportunity to clean the mounting bracket and inspect the fixture for any damage or deterioration. This is an ideal time to replace any worn-out gaskets or seals to prevent water infiltration.
Reinstallation: If the fixture requires replacement, follow the above steps in reverse order to install the new one. Ensure that all electrical connections are secure and properly insulated with wire nuts and electrical tape. Tighten the mounting bracket firmly and restore power at the circuit breaker or fuse box.
In conclusion, removing an outdoor flood light fixture involves careful consideration of safety, proper tools, and a systematic approach. By following the essential aspects outlined in this article, homeowners and professionals can safely and efficiently complete this task, ensuring the proper functioning of their outdoor lighting system.

How To Install Replace Outdoor Light Easy Simple

How To Remove Old Flood Light

3 Tips For Changing A Flood Light Bulb Doityourself Com

Changing A Halogen Lamp

Newhouse Lighting 30w 3600 Lumen 120 277 Volt Broe Non Dimmable Integrated Outdoor Led Weatherproof Bullet Flood Light And Mount V5blf30brz The Home Depot

Replace Flood Lights With Led Equivalent Saves Lots Of Electricity

Good Earth Lighting Broe Led Battery Operated Flood Light

Replace Flood Lights With Led Equivalent Saves Lots Of Electricity

Critech Flood Light 250 Watt For Outdoor Pure White

Lithonia Lighting 2 Lamp Outdoor White Flood Light Ofth 300pr 120 Wh M12 The Home Depot
Related Posts
