How to Put a Timer on Outdoor Lights
Outdoor lighting adds a touch of safety, security, and ambiance to any home. But managing their on/off schedule can be a hassle. Fortunately, timers offer a convenient and energy-efficient solution. This article will guide you through the process of installing a timer on your outdoor lights, explaining the different types and how to choose the right one for your needs.
Types of Outdoor Light Timers
There are several types of timers available for outdoor lighting, each offering distinct features and functionalities:
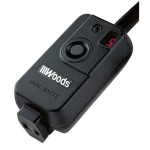
- Plug-in Timers: These are the simplest and most affordable option. They plug directly into an outlet and have a built-in timer that controls the connected lights. Plug-in timers are ideal for small lights or those that are already plugged into an outlet.
- Hardwired Timers: For permanent installations, hardwired timers are directly connected to the electrical wiring of your home. They offer more robust control and are suitable for larger outdoor fixtures.
- Photocell Timers: These timers automatically turn the lights on at dusk and off at dawn. Photocell timers are particularly useful for security lighting as they respond to changes in ambient light.
- Smart Timers: Connected to Wi-Fi or Bluetooth, smart timers allow remote control and scheduling via a smartphone app. This offers flexibility and allows you to adjust schedules from anywhere.
Choosing the Right Timer
Choosing the right timer depends on several factors:
- Type of Fixture: If your lights are plugged into an outlet, a plug-in timer is sufficient. For hardwired fixtures, a hardwired timer is necessary.
- Desired Function: If you need basic on/off scheduling, a standard timer will suffice. For automatic dusk-to-dawn operation, a photocell timer is optimal. Smart timers offer advanced features like remote control and customizable schedules.
- Budget: Plug-in timers are the most affordable, while hardwired and smart timers can be more expensive.
- Installation Expertise: Plug-in timers are easy to install, while hardwired timers require some electrical knowledge. Smart timers may also involve additional setup for connectivity.
Installing a Timer
The installation process varies depending on the type of timer you choose. Here's a general guideline:
- Plug-in Timer: Simply plug the timer into the outlet and connect the lights to the timer's outlet.
- Hardwired Timer: This process requires turning off the power supply to the fixture. You will need to disconnect the existing wires from the fixture, connect them to the timer, and then reconnect the fixture to the timer. This is best left to a qualified electrician.
- Photocell Timer: These are often hardwired and installed in the same manner as regular hardwired timers. The photocell sensor automatically detects light levels to trigger on/off commands.
- Smart Timer: Follow the manufacturer's instructions. This often involves connecting the timer to your Wi-Fi network and setting up a mobile app to manage its functionality.
Always consult the manufacturer's instructions for specific installation steps and safety precautions. If you are unsure about any part of the process, it is best to seek help from a qualified electrician.
Tips for Using Outdoor Timers
- Set Realistic Schedules: Consider your lifestyle and when you need the lights to be on or off.
- Adjust for Seasonal Changes: Sunset and sunrise times vary throughout the year, so adjust your schedules accordingly.
- Test Regularly: Ensure your timer is functioning correctly by checking the lights at different times.
- Use Energy-Efficient Bulbs: By using LED bulbs, you can reduce energy consumption and save money on your electricity bill.
Installing a timer for your outdoor lights is a simple and effective way to enhance safety, security, and energy efficiency. By choosing the right timer and following the instructions, you can enjoy the benefits of automatic lighting control with ease.

How To Put Outdoor Lights On A Timer Electronicshub

How To Use A Timer Switch For Lights

Easy To Install Programmable Timer The Lady Diy

3 Remarkably Easy Solutions For An Automatic Porch Light Timer

Can You Put Outdoor Lights On A Timer Sorta Techy

Mastering Outdoor Lighting A Step By Guide To Setting Up And Usi Govee

Trying To Install Digital Timer Outside Lights Have Two Switches Control Old Switch Has Black Common

How To Set Your Outdoor Lighting Timers

3 Easy Automatic Porch Light Timers

Digitally Programmable Outdoor Lights Timer Light Source
Related Posts
