How to Paint Your Outdoor Light Fixtures
Outdoor light fixtures can become faded, discolored, or simply outdated over time. A fresh coat of paint can revitalize their appearance and enhance the curb appeal of your home. Painting your outdoor light fixtures is a relatively simple DIY project that can be accomplished with the right tools and materials. This article provides a step-by-step guide on how to paint outdoor light fixtures effectively.
1. Preparation and Cleaning
Thorough preparation is crucial for a successful paint job. Begin by disconnecting the power to the fixture at the circuit breaker. This ensures safety while working on the fixture. Next, remove any glass panels, globes, or other removable parts. These components should be cleaned separately.
The fixture itself needs a thorough cleaning. Use a mild detergent and a soft cloth to remove dirt, grime, spiderwebs, and any other debris. Pay close attention to crevices and corners. For stubborn stains, a toothbrush or a scrub brush can be helpful. Once cleaned, allow the fixture to dry completely before proceeding.
2. Sanding and Priming
Sanding the surface of the fixture helps to create a better bond for the paint. Use fine-grit sandpaper (120-grit or higher) and sand the entire surface gently. Avoid using coarse sandpaper as it can mar the metal. Sanding also removes any rough edges or imperfections. After sanding, wipe the surface with a damp cloth to remove dust particles.
Applying a primer after sanding is essential for a durable and long-lasting paint job. Primers act as a barrier between the metal and the paint, preventing rust and providing a smooth surface for the paint to adhere to. Choose a primer specifically designed for outdoor use and suitable for the metal type of your fixtures. Apply the primer evenly using a brush or a spray gun, following the manufacturer's instructions.
3. Painting the Fixture
Select a paint specifically designed for outdoor use and weather resistance. Consider the color and finish that best complements your home's exterior. Oil-based paints provide excellent durability and resistance to fading, but they can be slow drying. Latex paints, on the other hand, are water-based, dry faster, and clean up easily with soap and water. Choose a paint that matches the existing finish on your fixtures or one that creates a new, desired look.
Apply the paint in thin, even coats, allowing each coat to dry completely before applying the next. Use a brush or a spray gun, depending on your preference and the size of the fixture. If using a brush, use gentle, overlapping strokes to avoid brush marks. If using a spray gun, maintain a consistent distance and angle for optimal application.
4. Reassembly and Finishing Touches
After the final coat of paint has dried completely, reassemble the fixture. Replace the glass panels, globes, and any other removed parts. Be careful not to scratch or damage the newly painted surface. Once reassembled, inspect the fixture for any imperfections or drips. If necessary, use a fine-grit sanding block to smooth out any rough edges.
To further enhance the protection and appearance of the fixture, consider applying a clear sealant. Sealants create a protective barrier against moisture, UV rays, and other elements, extending the life of the paint and preventing premature fading. Apply the sealant according to the manufacturer's instructions, allowing it to dry completely before restoring power to the fixture.

How To Spray Paint Outdoor Light Fixtures True Value

How To Paint Light Fixtures Front Porch Refresh Budget Friendly

Spray Painting Outdoor Lights It Works Thrifty Decor Diy And Organizing

Paint Your Faded Outdoor Light Fixture For A New Look On The I Removed After Goo Fixtures Country Living Decor Painting Trim

How To Paint Light Fixtures Front Porch Refresh Budget Friendly

Make Old Outdoor Lighting Look New For 20 Thrifty Little Mom

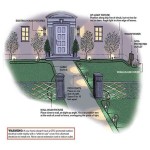
Refresh Your Lamp Post With This Easy Makeover Onecreativemommy Com

How To Paint Light Fixtures Front Porch Refresh Budget Friendly

Painting Over Brass With Rustoleum Oil Rubbed Broe Paint A Tutorial I Should Be Mopping The Floor

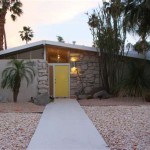
Update Your Outdoor Lighting With This Easy Diy Light Makeover Fixtures
Related Posts