How to Mount Outdoor Lights
Outdoor lighting can transform a property's aesthetic and functionality, enhancing safety, security, and ambiance. Whether illuminating pathways, highlighting landscaping features, or providing security lighting, proper mounting techniques are crucial for both aesthetic appeal and long-term performance. This guide will outline the essential steps and considerations for mounting outdoor lights effectively.
1. Planning and Preparation
Before mounting any outdoor lighting, careful planning is essential to ensure both functionality and safety.
A. Determine Lighting Needs: - Consider the purpose of the lighting (security, ambiance, accent lighting). - Identify specific areas that require illumination. - Assess the required light distribution patterns (spread, focused, directional). - Determine the appropriate light types (floodlights, spotlights, string lights, path lights). B. Location and Placement: - Choose mounting locations that provide optimal illumination and visibility. - Factor in power source availability and accessibility. - Consider potential obstructions (trees, buildings, structures). - Ensure adequate clearance from walkways, driveways, and landscaping. C. Electrical Considerations: - Verify the electrical circuit capacity to accommodate the lights. - Determine the required voltage (120V, 240V, low voltage). - Select appropriate wiring and connectors for outdoor use (waterproof, weather-resistant). - Ensure compliance with local electrical codes and regulations.
2. Mounting Techniques
The choice of mounting technique depends on the type of light fixture, desired placement, and structural considerations.
A. Direct Mounting: - This method involves attaching the fixture directly to a solid surface (e.g., wall, post, soffit). - Use appropriate fasteners (screws, bolts, nails) suitable for the surface material. - Ensure a secure and level installation for optimal performance. B. Surface Mounting: - Suitable for mounting on flat surfaces, such as walls or fences. - Typically involves a mounting plate or bracket that attaches to the fixture. - Allows for easier adjustments and removal compared to direct mounting. C. Suspended Mounting: - Utilizes a hanging system to suspend the fixture from a beam, ceiling, or tree branch. - Requires sturdy mounting points and appropriate hanging hardware. - Provides flexibility in positioning and height adjustment. D. Post Mounting: - Designed for mounting on poles or posts. - Requires specific mounting brackets or clamps suitable for the post diameter. - Provides a secure and elevated installation for wider coverage.
3. Safety and Maintenance
Proper safety practices are essential throughout the mounting process and ensure long-term performance.
A. Safety Precautions: - Always disconnect power to the circuit before working on electrical wiring or fixtures. - Use insulated tools and gloves for added protection. - Follow all manufacturer instructions and safety guidelines. B. Maintenance: - Regularly inspect the fixtures for signs of damage, corrosion, or loose connections. - Clean the fixtures periodically to remove dust, dirt, and debris. - Replace bulbs as needed to maintain optimal illumination. - Consider using timers or motion sensors to optimize energy efficiency and security.

How To Hang Patio Lights

How To Hang Patio Lights

28 Backyard Lighting Ideas How To Hang Outdoor String Lights

How To Hang Outdoor String Lights Step By Guide

How To Install Outdoor Flush Mount Lights

Outdoor Lighting Guide Delmarfans Com

Dusk To Dawn Motion Sensor Outdoor Porch Lights With Gfci Waterproof Light Fixture Anti Rust Exterior Wall Mount 3 Modes For House Garage Bulb Not Included Com

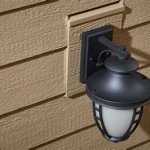
New House Siding How Do I Install Outdoor Lights On This Bracket Doityourself Com Community Forums

Outdoor Wall Lights Dusk To Dawn Lighting Fixture Mount 2 Pack Lamp Black Front Door For Porch Garage Patio Com

7 Awesome Outdoor Lighting Ideas For Your Backyard Bob Vila
