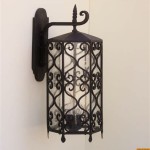
How to Mount Outdoor Light
Enhancing the exterior of your home with outdoor lighting not only provides illumination but also adds aesthetic appeal and increases security. Whether you're illuminating a pathway, showcasing architectural features, or adding a touch of ambiance to your patio, mounting outdoor lights is a relatively straightforward DIY project that can transform the look and feel of your outdoor space. Follow these essential steps to ensure a secure and aesthetically pleasing installation.
1. Choose the Right Light Fixture
Selecting the appropriate outdoor light fixture is crucial. Consider the purpose and location of the light. For example, path lights are ideal for illuminating walkways, while floodlights provide wide-area coverage for security or accent lighting. Choose fixtures made from durable materials such as stainless steel or aluminum that can withstand outdoor elements.
2. Determine the Mounting Location
Decide where you want to mount the light fixture. Consider the height, angle, and direction of the light. For path lights, aim for a height of 12-18 inches above the ground to provide sufficient illumination without glare. For accent lighting, position the fixture to highlight specific features like trees or sculptures.
3. Gather the Necessary Tools
Before beginning the installation, gather the necessary tools: a drill, screwdriver, wire strippers, electrical tape, and a voltage tester. If you're working with electricity, it's essential to take safety precautions such as wearing gloves, eye protection, and turning off the power at the main circuit breaker.
4. Prepare the Electrical Connection
Most outdoor light fixtures require an electrical connection to a junction box or wire. If there isn't an existing junction box at the desired location, you may need to install one. Connect the wires of the fixture to the corresponding wires in the junction box using wire nuts and secure them with electrical tape.
5. Mount the Fixture
Align the fixture over the mounting bracket or surface. Secure the fixture using the provided screws or bolts. Ensure that the fixture is tightly mounted to prevent movement or vibrations.
6. Connect the Power
Turn on the power at the main circuit breaker and test the light fixture. If the light doesn't turn on, check the connections and ensure that the bulb is properly installed. Replace the bulb if necessary.
7. Adjust the Angle and Direction
After mounting the fixture, adjust the angle and direction of the light to achieve the desired illumination. Many fixtures come with adjustable heads or knuckles that allow for customization. Use a screwdriver to loosen the adjustment screws and carefully reposition the light as needed.
By following these essential steps, you can successfully mount outdoor light fixtures and enhance the functionality and aesthetics of your outdoor space. Remember to choose the right light fixture, determine the mounting location, gather the necessary tools, prepare the electrical connection, mount the fixture securely, connect the power, and adjust the angle and direction for optimal illumination.

Replacing An Outdoor Light Fixture

How To Hang Outdoor String Lights And Make Them Look Good Wirecutter

How To Hang Outdoor String Lights And Make Them Look Good Wirecutter

Replacing An Outdoor Light Fixture

How To Install Outdoor Flush Mount Lights

How To Install Outdoor Lighting And Diy Family Handyman
Installing Light On Round Junction Service Box Diy Home Improvement Forum

New House Siding How Do I Install Outdoor Lights On This Bracket Doityourself Com Community Forums

Dusk To Dawn Motion Sensor Outdoor Porch Lights With Gfci Waterproof Light Fixture Anti Rust Exterior Wall Mount 3 Modes For House Garage Bulb Not Included Com

Hickory Point 16 1 2 Walnut Broe Outdoor Pier Mount Light N8950 Lamps Plus
Related Posts
