How to Mount Outdoor Garage Lights: A Comprehensive Guide
Garage lights help provide a secure and well-lit environment, ensuring safe entry and exit from your garage. Choosing the right lights and mounting them correctly is essential for optimal performance and longevity.
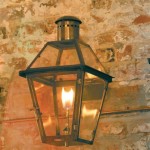
1. Choose the Right Lights
Consider these factors when selecting garage lights:
- Brightness: Measure brightness in lumens. For a standard single-car garage, aim for at least 3000 lumens. If you're using LED bulbs, look for bulbs marked as "bright white" or "daylight." Avoid halogen or incandescent bulbs, as they generate excessive heat.
- Beam Angle: Select a wide beam angle to ensure even distribution of light. Choose floodlights with beam angles between 100 and 120 degrees.
- Light Color: Choose a color temperature between 4000K and 5000K for bright, natural light.
- Durability: Look for lights with sturdy construction, such as metal or polycarbonate.
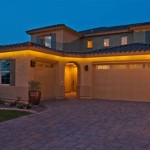
2. Position and Spacing
To ensure proper coverage, consider these guidelines:
- Garage Ceiling Height: For 8-foot ceilings, mount lights 4-5 feet from the ceiling. Adjust accordingly for higher or lower ceilings.
- Spacing: As a general rule, space lights 8-12 feet apart. Adjust based on the beam angle and brightness of your chosen lights.
- Angle: Position the lights so that they point slightly downward, directing light toward the floor.
- Orientation: Arrange the lights in a row parallel to the garage door for optimal illumination.
3. Wire and Connect the Lights
Follow these steps to wire and connect your garage lights:
- Determine Circuit: Ensure you have a dedicated circuit for the garage lights to avoid overloading the main circuit.
- Install Junction Box: If there's no existing junction box, install one on the ceiling where you plan to mount the first light.
- Connect Wires: Connect the black wire from the junction box to the black wire of the light fixture, the white wire to the white wire, and the ground wire to the green or bare wire.
- Mount the Light Fixture: Attach the light fixture to the junction box using the provided mounting hardware.
- Complete the Circuit: Extend the wires from the first light fixture to the next location, repeating the wiring process until all lights are connected.
- Test the Lights: Turn on the circuit breaker or switch connected to the garage lights and ensure they all illuminate properly.
4. Enjoy Your Well-Lit Garage
With your newly installed garage lights, you can now enjoy the benefits of a bright and well-lit garage. Remember to perform regular maintenance, such as cleaning the fixtures and replacing bulbs as needed, to ensure continued optimal performance.

Comprehensive Guide To Garage Exterior Lighting Adding Curb Appeal

Tips For Choosing The Right Size Outdoor Wall Lights Home Depot

How To Install Outdoor Garage Lights Over The Moon

Outdoor Lighting Guide Delmarfans Com

How To Install And Wire Outdoor Light Fixtures Easy Home Diy Project

Replacing An Outdoor Light Fixture

Rosykite Outdoor Wall Lights Exterior Modern Outside Sconce Ligh

American Made Indoor Outdoor Barn Lights Steel Lighting Co

Outdoor Lighting Guide Delmarfans Com

How To Choose The Best Garage Lighting For Your Home
Related Posts