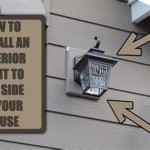
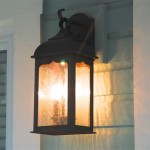
How to Mount an Outdoor Light on Vinyl Siding
Installing an outdoor light fixture on vinyl siding is a common DIY project. It can enhance the aesthetic appeal of your home and provide much-needed illumination. However, mounting an outdoor light fixture on vinyl siding requires a specific approach to ensure proper installation and avoid damaging the siding. This article outlines steps and considerations for mounting an outdoor light on vinyl siding.
Choosing the Right Fixture
The first step is to choose the appropriate fixture for your needs and the existing siding. Consider the following factors:
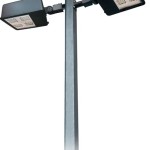
- Fixture type: Choose between a wall-mounted, post-mounted, or pendant fixture based on your intended placement and style preferences.
- Size and weight: Select a fixture that is appropriately sized for the space and consider the weight of the fixture, as excessive weight can strain the mounting points.
- Material: Opt for durable materials like aluminum or stainless steel, which are resistant to weather and rust.
- Finish: Choose a finish that compliments the existing color scheme of your home and withstands environmental elements.
After choosing the light fixture, carefully review the manufacturer's installation instructions. These instructions may contain specific recommendations for mounting onto vinyl siding.
Preparing the Installation Area
Before mounting the fixture, ensure the area is properly prepared. This includes:
- Selecting the mounting location: Carefully choose the location for the fixture. Consider factors such as electrical access, proximity to existing outlets, and aesthetics.
- Cleaning the area: Thoroughly clean the area with warm, soapy water, ensuring it is free from dirt, grime, and debris. Allow the area to dry completely before proceeding.
- Measuring and marking: Use a level and pencil to mark the precise location for the fixture on the siding. Be sure to account for the dimensions of the fixture and any necessary adjustments for installation.
- Verifying electrical access: Ensure that you have a suitable electrical outlet nearby, or consider the need for electrical conduit if a new outlet needs to be installed.
Mounting the Light Fixture
Once the area is prepared, it's time to mount the fixture. This process follows these steps:
- Choose the appropriate mounting method: Vinyl siding is relatively soft and susceptible to damage. To avoid piercing the siding, use a mounting method that distributes the weight of the fixture across a larger area. Common options include:
- Siding clips: These metal clips attach to the siding behind the fixture, distributing the weight over several siding panels.
- J-channel mounting: This method requires installing a J-channel trim piece near the fixture location. The fixture then mounts to the J-channel, providing a larger surface area for support.
- Vinyl siding screws: These specialized screws are designed to drill through vinyl without fracturing. To avoid cracking the siding, drill pilot holes slightly smaller than the screw diameter. These screws typically have a larger head that is not designed to directly penetrate the siding.
- Install the mounting components: Follow the manufacturer's instructions for installing the siding clips, J-channel, or vinyl siding screws. Ensure they are installed securely and level.
- Mount the fixture: Align the fixture with the marked spot and attach it to the mounting components using the provided hardware. Properly tighten all screws or bolts to ensure a secure installation.
- Connect the electrical wiring: Disconnect the power to the electrical outlet before working on the wiring. Connect the fixture's wiring to the electrical outlet using the appropriate wires and wire nuts. Ensure all connections are secure and properly insulated. Reconnect power and test the fixture to confirm it works properly.
Tips for Preventing Damage
To prevent damage to the vinyl siding during installation, follow these tips:
- Avoid direct drilling into the siding: As mentioned earlier, direct drilling into vinyl siding can lead to cracking or splitting. Instead, utilize the methods described above to distribute the weight and avoid piercing the siding.
- Use a drill with a low torque setting: When using vinyl siding screws, select a drill with a low torque setting to minimize the risk of over-tightening and damaging the siding.
- Avoid excessive pressure: When tightening screws or bolts, avoid applying excessive pressure to the fixture. This can lead to warping or bending the flimsy siding.
- Inspect the siding regularly: Periodically inspect the siding for signs of damage or wear. This will help identify any potential problems early on and minimize the risk of further damage.
Mounting an outdoor light fixture on vinyl siding is a straightforward task when done correctly. By carefully considering the factors discussed above and following the outlined instructions, you can successfully install your new fixture and enjoy the benefits of added illumination for your home. Remember that it is important to always consult with a qualified professional regarding any electrical work or if you have any concerns about the installation process.

New House Siding How Do I Install Outdoor Lights On This Bracket Doityourself Com Community Forums

Vinyl Siding Lights How To Mount Using A Mounting Block Diy

How To Add A Light Fixture Vinyl Siding Electrical Box Aka J Block

How To Install An Exterior Light Fixture On Vinyl Siding

How To Install A Mounting Block On Existing Vinyl Siding Step By Tutorial

Exterior Light Installation On Vinyl Siding Block

How To Install Outdoor Light Fixtures On A Surface Mounting Block

How To Install A Mounting Block On Existing Vinyl Siding Step By Tutorial

Vinyl Siding Lights How To Mount Using A Mounting Block Installation Blocks

How To Install A Porch Light
Related Posts