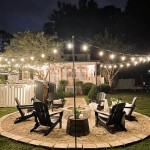
How to Make Outdoor Hanging Lights: A Comprehensive Guide
Outdoor hanging lights are a fantastic way to illuminate your backyard, patio, or garden. They create a warm and inviting ambiance, making it perfect for entertaining guests or simply relaxing outdoors. While purchasing outdoor hanging lights is an option, making your own can be a rewarding and cost-effective alternative.
In this comprehensive guide, we'll walk you through the essential aspects of making outdoor hanging lights, from choosing the right materials to assembling and installing your creations. Whether you're a seasoned DIY enthusiast or a novice looking for a fun project, we'll provide all the information you need to craft beautiful and functional outdoor hanging lights.
Choosing the Right Materials
The first step in making outdoor hanging lights is selecting the right materials. The following items are essential:
- Light fixture: This is the housing that will hold the light bulb and electrical components.
- Pendant cord: This is the cord that will suspend the light fixture from a ceiling or other support structure.
- Light bulb: Choose a light bulb that is suitable for outdoor use and provides the desired amount of light.
- Electrical components: These include a socket, switch, and wire connectors.
- Weather-resistant materials: Since the lights will be exposed to the elements, it's crucial to choose materials that can withstand moisture, sunlight, and temperature fluctuations.
Assembling the Hanging Lights
Once you have gathered your materials, it's time to assemble the hanging lights. Follow these steps:
- Attach the pendant cord to the light fixture. Pass the cord through the hole in the top of the light fixture and secure it with a lock nut or other appropriate method.
- Install the electrical components. Connect the socket to the pendant cord and secure it with wire connectors. Then, attach the switch to the socket.
- Insert the light bulb. Screw the light bulb into the socket.
Installing the Hanging Lights
Now that your hanging lights are assembled, it's time to install them. Here's how:
- Choose a suitable location. Decide where you want the lights to hang and ensure there is a power source nearby.
- Mount a ceiling or bracket. Install a ceiling hook or bracket to support the hanging lights.
- Suspend the lights. Hang the lights from the ceiling hook or bracket using the pendant cord.
- Connect the power. Connect the wires from the hanging lights to the power source using wire connectors.
- Test the lights. Turn on the switch to ensure the lights are working properly.
Tips for Personalizing Your Hanging Lights
There are many ways to personalize your outdoor hanging lights. Here are a few ideas:
- Use different materials. Experiment with various materials such as wood, metal, or fabric to create unique designs.
- Add decorative elements. Embellish your lights with beads, chains, or other decorative accents.
- Create custom shades. Design and attach custom shades made of fabric, paper, or other materials to give your lights a distinctive look.
Conclusion
Making outdoor hanging lights is a fun and rewarding project that can add charm and ambiance to your backyard. By following the steps outlined in this guide, you'll be able to create beautiful and functional lights that will illuminate your outdoor space for years to come.

Diy Backyard String Lights Taryn Whiteaker Designs

28 Backyard Lighting Ideas How To Hang Outdoor String Lights

21 Creative Diy Lighting Ideas Outdoor Pendant Light Backyard

Diy Outdoor Lights Simple And Easy Ideas For Homes Craftionary

Diy Outdoor Hanging String Lights Monsterscircus

Diy Outdoor Hanging String Lights Monsterscircus

Tin Can Diy Outdoor Lighting Tutorial You Do This The Heathered Nest

Hanging Solar Tea Lights Melly Sews

Diy Outdoor Hanging String Lights Monsterscircus

Diy Outdoor Light Balls In 5 Simple Steps Pine And Poplar
Related Posts
