How to Install a Timer Switch for Outdoor Lights
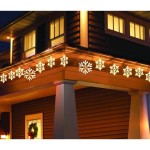
Installing a timer switch for outdoor lights is a great way to add convenience and security to your home. It can help you turn your lights on and off at specific times, so you don't have to worry about forgetting or being out when they need to be turned on. Additionally, having your outdoor light on automatically when it starts turning dark can help deter criminals from targeting your home.
Materials You'll Need
- Timer switch
- Electrical tape
- Wire nuts
- Screwdriver
- Wire strippers
- Drill (optional)
Steps
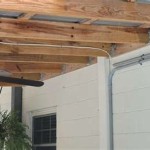
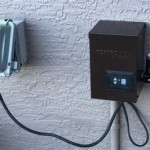
1. Choose a location The first step is to choose a location for your timer switch. It should be in a sheltered area where it will not be exposed to the elements. If possible, it should also be close to an outlet so you don't have to run a long extension cord. 2. Install the mounting bracket Once you have chosen a location, you need to install the mounting bracket for the timer switch. Most timer switches come with a mounting bracket that can be screwed or bolted to a wall or post. Use a drill to create pilot holes if necessary. 3. Wire the timer switch The next step is to wire the timer switch. First, turn off the power to the circuit that you will be working on. Then, strip about 1 inch of insulation from the ends of the wires. Connect the black wire from the timer switch to the black wire from the power source. Connect the white wire from the timer switch to the white wire from the power source. Connect the bare ground wire from the timer switch to the green or bare ground wire from the power source. Twist the ends of the wires together and secure them with a wire nut. 4. Mount the timer switch Once the timer switch is wired, you can mount it to the mounting bracket. Most timer switches simply snap into place. 5. Set the timer The final step is to set the timer. Most timer switches have a dial or buttons that you can use to set the on and off times. Set the timer to the desired times and then turn the power back on. 6. Test the timer Once the timer is installed and set, test it to make sure it is working properly. Turn the power back on and wait for the timer to switch on and off at the desired times.Tips
- If you are not comfortable working with electricity, it is best to hire a qualified electrician to install your timer switch.
- Make sure to use the correct type of wire nuts for the size of wire you are using.
- Test your timer switch regularly to make sure it is working properly.

Wiring A Honeywell 3 Way Timer Switch Stephen Ostermiller

I Am To Be Wiring A Woods Indoor Outdoor Time Switch Multi Volt Model 59396 59399 30 Automatically Turn On

How To Wire Timers

How To Install Timer

Automatic Street Light Control System Time Swicth For

Easy To Install Programmable Timer The Lady Diy

How To Install A Timer Switch In Outdoor Lighting Doityourself Com

Defiant 15 Amp In Wall 3 Way Daylight Adjusting Digital Timer Switch With Terminals White 32648 The Home Depot

How To Put Outdoor Lights On A Timer Electronicshub

Installing A Timer
Related Posts