How to Install Outdoor Yard Lights: A Comprehensive Guide for Beginners
Outdoor yard lights are an effective way to enhance the beauty and safety of your home. They illuminate pathways, highlight architectural features, and create a welcoming atmosphere. Installing them may seem daunting, but with the right steps and a little preparation, it can be a rewarding and straightforward process.
1. Plan Your Lighting Scheme
Start by determining the purpose of the lights and where you want them placed. Consider the size, shape, and height of your yard, as well as the areas you need to illuminate. Sketch a layout plan on paper or use an online tool to visualize the placement.
2. Gather Necessary Materials
You will need the following materials:
- Outdoor yard lights (appropriate wattage and style)
- Light posts or fixtures (if necessary)
- Electrical wire (12-gauge or thicker)
- Wire connectors (waterproof)
- Electrical tape
- Trenching shovel
- Screwdriver or drill
3. Choose the Right Wattage
The wattage of the lights determines the brightness. For pathway lighting, use 10-20 watts, while for floodlights or spotlights, 100 watts or more may be needed. Choose a wattage that provides adequate illumination without being overpowering.
4. Dig Trenches for Wires
Dig trenches approximately 6 inches deep and wide enough to accommodate the electrical wires. Plan the trenches to connect the lights to a power source, such as an outdoor outlet or electrical panel. Keep the wires underground to prevent tripping hazards.
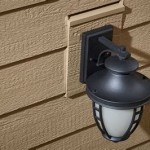
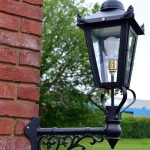
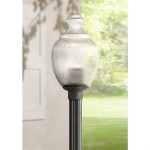
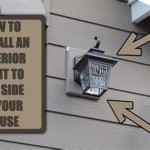
5. Install the Light Posts or Fixtures
If using light posts, install them according to the manufacturer's instructions. Anchor them securely in the ground using concrete or stakes. If mounting lights directly on walls or surfaces, use appropriate screws or fixtures.
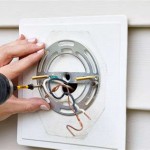
6. Connect the Electrical Wires
Strip the ends of the electrical wires and connect them to the corresponding terminals on the lights and power source. Use wire connectors and electrical tape to secure the connections. Ensure all connections are weatherproof.
7. Bury the Wires
Once the wires are connected, carefully bury them in the trenches. Backfill the trenches with soil and tamp them down to compact the earth. Cover the wires with protective conduit if desired.
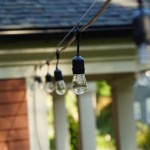
8. Install the Light Bulbs
Install the light bulbs into the fixtures and turn on the power. Verify that all lights are working properly and make adjustments as necessary. Enjoy the ambiance and safety that your new outdoor yard lights bring.
9. Maintenance Tips
Regular maintenance will keep your yard lights in optimal condition. Clean the lights periodically to remove dirt or debris. Check the connections and wires for any damage or loose fittings. Replace light bulbs as needed and consult a professional electrician for any major repairs or upgrades.

How To Install Your Own Outdoor Backyard Lighting My 100 Year Old Home

28 Backyard Lighting Ideas How To Hang Outdoor String Lights

How To Hang Patio Lights

How To Install Low Voltage Outdoor Landscape Lighting 1000bulbs Blog

How To Install Outdoor Low Voltage Led Step Lights Mullan Lighting

How To Install A Yard Light Post Electrical Projects Home Wiring Lights

How To Install Outdoor Lighting And Diy Family Handyman

Outdoor Low Voltage Lighting Diy Family Handyman

Diy Backyard String Lights Taryn Whiteaker Designs

28 Backyard Lighting Ideas How To Hang Outdoor String Lights
Related Posts