A Comprehensive Guide to Installing Outdoor Wall Sconces and Recessed Lights
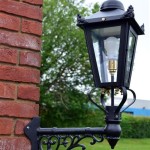
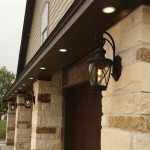
Outdoor lighting plays a crucial role in enhancing the ambiance, safety, and security of your outdoor space. Wall sconces and recessed lights are two popular types of outdoor lighting that can effectively illuminate pathways, entrances, and seating areas. Installing them might seem daunting, but with a bit of planning and the right tools, you can tackle this project successfully.
Choosing the Right Fixtures
Selecting the appropriate fixtures is the first step in installing outdoor wall sconces and recessed lights. Consider the following factors:
- Size and Shape: Choose fixtures that are proportionate to the size of your outdoor space and the areas you want to illuminate.
- Material and Durability: Opt for fixtures constructed from weather-resistant materials such as aluminum, stainless steel, or powder-coated steel.
- Light Output: Determine the amount of light needed for the specific area you're illuminating and select fixtures with appropriate wattage and brightness.
- Style: Choose fixtures that complement the architectural style of your home and the desired ambiance of your outdoor space.
Preparing for Installation
Before you start installing, gather the necessary tools and materials:
- Drill and drill bits
- Screwdriver
- Electrical wire
- Wire connectors
- Electrical tape
- Safety glasses and gloves
Safety should be your top priority when working with electricity. Always turn off the power at the main electrical panel before beginning any electrical work.
Installing Outdoor Wall Sconces
- Determine the Mounting Location: Choose a location for the wall sconce and mark it with a pencil.
- Connect the Wires: Run the electrical wire from the main electrical box to the mounting location and connect it to the fixture's wires using wire connectors.
- Mount the Fixture: Secure the fixture to the mounting bracket or backplate using screws.
- Restore Power: Turn on the power at the main electrical panel and test the wall sconce to ensure it's working properly.
Installing Recessed Lights
- Cut the Opening: Use a hole saw or drywall cutter to make a circular opening in the ceiling where you want to install the recessed light.
- Connect the Wiring: Run the electrical wire from the main electrical box to the opening and connect it to the fixture's wires using wire connectors.
- Fit the Fixture: Insert the recessed light fixture into the opening and secure it using spring clips or screws.
- Finish Installation: Push the fixture's trim into place and connect the wires to the fixture.
Additional Tips
- Hire a Licensed Electrician: For complex installations or if you're uncomfortable working with electricity, consider hiring a licensed electrician.
- Use Weatherproof Fixtures: Ensure that all fixtures are rated for outdoor use and are protected from moisture and temperature extremes.
- Direct Light Properly: Position wall sconces and recessed lights to direct light where it's needed, avoiding glare and excessive spillover.
- Maintain Regularly: Clean fixtures and bulbs regularly to maintain their efficiency and performance.
With careful planning and attention to safety, installing outdoor wall sconces and recessed lights can enhance the ambiance, functionality, and security of your outdoor space. By following these steps and considering the tips provided, you can create a well-lit outdoor environment that meets your specific needs and complements the aesthetics of your home.

How To Install An Outdoor Wall Sconce And Recessed Lights All About Ask This Old House

How To Install Outdoor Wall Sconces

Outdoor Lighting Placement Kichler

How To Fit Outdoor Lights Lighting Electrical Security B Q

Replacing An Outdoor Light Fixture

How To Wire Recessed Lighting Tabletop Walk Through

Exterior Recessed Soffit Lighting Aspectled

How To Wire Recessed Lighting Tabletop Walk Through

8 Outdoor Recessed Lighting Ideas For Your Porch Flip The Switch

Outdoor Lighting Guide Delmarfans Com
Related Posts
