How To Install Outdoor Speaker Wire
Installing outdoor speaker wire is a relatively simple project that can be completed in a few hours. By following these steps, you can ensure that your speakers are properly connected and will provide you with years of enjoyment.
Materials You'll Need
- Outdoor speaker wire
- Wire strippers
- Electrical tape
- Speaker wire connectors (optional)
- Drill or screwdriver (optional)
Choosing the Right Wire
The first step is to choose the right outdoor speaker wire. There are many different types of wire available, so it's important to select one that is designed for outdoor use. Outdoor speaker wire is typically made of copper or aluminum, and it is coated with a protective jacket that helps to resist the elements.
When choosing speaker wire, you'll need to consider the length of the run and the gauge of the wire. The length of the run is the distance from the amplifier to the speakers. The gauge of the wire is a measure of its thickness. Thicker wire has less resistance, which means that it can carry more power. For most outdoor applications, 14-gauge or 16-gauge wire is sufficient.
Installing the Wire
Once you have chosen the right wire, you can begin installing it. The first step is to strip the ends of the wire. Use a wire stripper to remove about 1/2 inch of insulation from each end of the wire.
Next, you'll need to connect the wire to the speakers. Most outdoor speakers have a terminal block that accepts bare wire. Simply insert the stripped ends of the wire into the terminal block and tighten the screws.
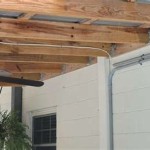
Once the wire is connected to the speakers, you can run it to the amplifier. If you're running the wire underground, be sure to bury it at least 6 inches deep. You can also run the wire through conduit or along the side of your house.
Once the wire is run to the amplifier, you can connect it to the speaker terminals. Most amplifiers have a red terminal for the positive wire and a black terminal for the negative wire. Be sure to connect the positive wire to the positive terminal and the negative wire to the negative terminal.
Testing the System
Once the wire is installed, you can test the system by playing some music. If you hear any static or distortion, it's likely that the wire is not connected properly. Check the connections at the speakers and the amplifier to make sure that they are tight.
Tips
- When running the wire underground, be sure to use a conduit to protect it from damage.
- If you're running the wire through conduit, be sure to use a wire puller to make the job easier.
- Be sure to connect the positive wire to the positive terminal and the negative wire to the negative terminal.
- Test the system before you bury the wire underground.
By following these steps, you can ensure that your outdoor speakers are properly installed and will provide you with years of enjoyment.

How To Cable Outdoor Speakers Wiring Guide K B Audio

10 Tips For Installing Outdoor Speakers

How To Install Outdoor Speakers An Easy Step By Guide

How To Install Outdoor Speakers An Easy Step By Guide

Outdoor Speakers System Planning Guide
A Guide To Speaker Wire Theaterseat Blog

How To Install Outdoor Speakers An Easy Step By Guide

How To Install Outdoor Speakers Crutchfield

How To Hide Wiring Speaker And Low Voltage Wire Diy Family Handyman

All You Need To Know About How Connect Speaker Wire Receiver Soundcore Us
Related Posts


