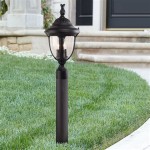
How to Install Outdoor Solar Lights
Outdoor solar lights offer a sustainable and aesthetically pleasing way to illuminate your yard, walkways, and other outdoor spaces. Installing these lights is a relatively straightforward process that can be done by most homeowners with some basic tools and a little patience. This guide will walk you through the steps involved in installing outdoor solar lights, helping you achieve a brighter and more inviting outdoor environment.
1. Planning the Installation
Before you start, it's important to plan the installation carefully. This will ensure that your solar lights are placed effectively and will provide adequate lighting. Here are some key considerations:
A. Determine the Location: Identify the areas you want to illuminate, such as pathways, entryways, decks, or flowerbeds. Consider the purpose of the lighting and choose locations that will best serve that purpose.
B. Consider Sunlight Exposure: Ensure that the solar panels will receive ample sunlight throughout the day. Ideally, they should be placed in a spot facing south (in the Northern Hemisphere) to maximize sun exposure. Avoid areas that are shaded by trees or buildings.
C. Assess the Number of Lights Needed: Decide how many solar lights you'll need to achieve the desired level of illumination. Consider the size of the area, the type of lights, and your personal preferences.
D. Choose the Right Type of Lights: Solar lights come in various styles, sizes, and features. Choose lights that align with your aesthetic preferences and the purpose of the installation. Consider factors such as brightness, light color (warm white, cool white), and the presence of additional features like motion sensors.
2. Preparing the Installation Site
Once you've determined the location and chosen the lights, it's time to prepare the installation site. This involves clearing the area and ensuring proper ground conditions:
A. Clear the Area: Ensure the area where you plan to install the lights is clear of debris, weeds, and any obstructions that may hinder installation.
B. Prepare the Ground: For ground-mounted solar lights, it may be necessary to loosen the soil or create a level surface. If you're installing on concrete or another hard surface, you may need to use anchors or mounting tape.
3. Installing the Solar Lights
The installation process for solar lights varies depending on the type and design. However, the following steps provide a general guide:
A. Assemble the Lights (If Necessary): Some solar lights require assembly. Follow the manufacturer's instructions carefully and ensure all parts are securely attached.
B. Locate the Solar Panel: Determine the optimal location for the solar panel to receive maximum sunlight. Consider the angle of the panel relative to the sun's path.
C. Mount the Solar Panel: Secure the solar panel to its designated location. This may involve using stakes, screws, or other mounting methods. Make sure the panel is stable and secure.
D. Connect the Light to the Panel: Connect the light fixture to the solar panel using the provided cables or wires. Ensure a secure connection to prevent any loose or faulty contacts.
E. Place the Light Fixture: Position the light fixture in the desired location. This may involve using a stake, mounting bracket, or other installation methods provided with the lights.
F. Adjust the Light Angle (If Necessary): Some solar lights have adjustable heads. Adjust the angle of the light fixture to direct the light beam towards the desired area.
4. Testing and Maintenance
Once the installation is complete, it's essential to test the lights and perform regular maintenance to ensure optimal performance:
A. Test the Lights: Turn on the lights to ensure they are functioning correctly. Check the brightness and the direction of the light beam.
B. Regular Cleaning: Clean the solar panels and light fixtures regularly to remove dirt, debris, and leaves. This will help maximize light absorption and prevent any performance issues.
C. Check Battery Life: If your solar lights use rechargeable batteries, periodically check the battery level and replace them when necessary. This will ensure optimal light performance throughout the night.
D. Inspect for Damage: Regularly inspect the lights for any signs of damage or wear and tear. This includes checking the wiring, connectors, and the general condition of the lights.
Installing outdoor solar lights is a rewarding experience. By following these steps and considering the necessary precautions, you can enjoy the benefits of these energy-efficient and aesthetically pleasing lighting solutions. Remember to choose high-quality lights and perform regular maintenance to ensure your solar lights continue to illuminate your outdoor spaces for years to come.

The Best Places To Install Solar Lights In Your Outdoor Space Bob Vila

How To Install Outdoor Solar Lights Homeserve Usa

Tips For Installing Maintaining Outdoor Solar Lights

How To Install Outdoor Solar Lighting

Tips For Installing Solar Lights Outdoors Pretty Diy Home

The Best Places To Install Solar Lights In Your Outdoor Space Bob Vila

Tips For Installing Solar Lights Outdoors Pretty Diy Home

Outdoor Solar Chandelier For Your Pergola Easy Diy Installation

How To Install Outdoor Solar Garden Lights Phoebus

Where To Install Outdoor Lighting New Zealand Handyman
Related Posts

